Windows Server 2012 - Overview
Windows Server 2012 codenamed Windows Server 8 is the most recent version of the operating system from Microsoft regarding server management. But it is not the last one, as the last one is Windows Server 2016. Officially it was released on August 1st, 2012 and is being sold as a commercial version only.

Improvements in Windows Server 2012
The major Improvements on this version are as follows −
- It is ready to be integrated with cloud systems and it still can maintain the classic features of local datacenters as a result Hyper-V Virtualization has new features Hyper-v replicas, it allows you to create virtual machines replications between clusters and storage systems.
- The Storage migration virtual disks can be moved to different physical storages, Virtual machine snapshots, virtual machines can be deleted from the Hyper-v and also from the virtual disks and it can be used directly without the need to shut down the virtual machine.
- The Core server installation easily switches to GUI installation without the need of reinstallation.
- The file server and storage service improvement is that it eliminates identical copies in the same volumes as such and saves space.
- The Storage pools and storage spaces allows you to group the hard disks to one or more storage pools then it allows to create virtual disks. It can add other disks to the storage pools and make available to the users without impacting them.
- The iSCSI Target Server can offer block storage to other servers and applications on the network using the iSCSI standard.
- Active Directory cloning can deploy additional domain controllers by cloning an existing virtual domain controller.
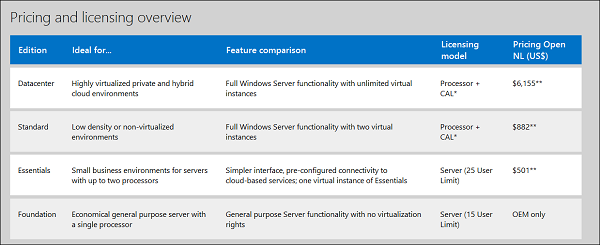
The Windows Server 2012 has four editions: Foundation, Essentials, Standard and Datacenter. Each one of them has their own limitation accept the Datacenter version which is also the most expensive one.
The following table will show what is the right one for your business needs −

For finding out the cost of licensing you can click on the following link − https://www.microsoft.com/en-us/server-cloud/products/windows-server-2012-r2/purchasing.aspx
Windows Server 2012 - Installation
In this chapter, we will discuss regarding the requirements and prerequisites of the Windows Server 2012.
System Requirements
Although most of the servers nowadays probably have the necessary requirements for Windows Server 2012. It will certainly be useful to know them in case you want to upgrade from an older system.
The main requirements are −
- CPU socket minimum 1.4 GHz (64-bit processor) or faster for single core and Microsoft recommends is 3.1 GHz (64-bit processor) or faster multi-core.
- RAM memory minimum is 2GB, but Microsoft recommends 8GB.
- 160 GB hard disk with a 60 GB system partition space in your hard disk.
One important thing to note here is that the installation process itself will verify your computer hardware and let you know if it qualifies for a Windows Server 2012 installation. If not, then you will need to upgrade your hardware.
Installation
The following steps are to be adhered for the installation of Windows Server 2012.
Step 1 − We can download the evaluation ISO of Windows Server 2012 R2 from the following link − https://www.microsoft.com/en-us/evalcenter/evaluate-windows-server-2012-r2
But you will need to sign in first with a Microsoft account like Hotmail for example in order to complete the download and the good thing is that the evaluation period will last for 180 days, so you will have enough time to know if it will be the right product for you or not.

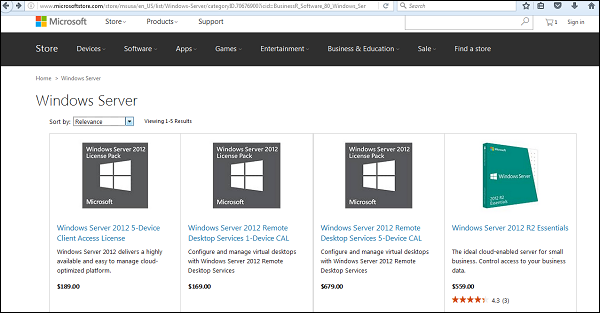
At the end, if you decide to buy the license of your Windows server 2012 R2. You can purchase it online via a Microsoft online store found in − http://www.microsoftstore.com/store/msusa/en_US/list/Windows-Server/categoryID.70676900?icid=BusinessR_Software_80_Windows_Server_112315
For the Enterprise solution, I would recommend to purchase it via a Microsoft partner that is found in your country.
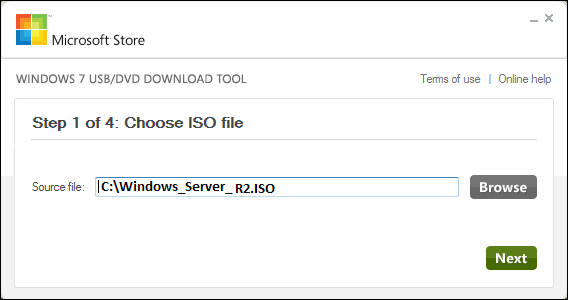
Step 2 − After downloading the ISO of Microsoft, create a boot USB driver which can be created with the Microsoft tool called Windows USB/DVD Download Tool and can be downloaded from the following link − https://www.microsoft.com/en-us/download/windows-usb-dvd-download-tool
After downloading the EXE file, open it and select the ISO file location and then click next like in the following screenshot, and wait up to the end when the Boot USB is created.
Step 3 − After completing the above given steps, plug-in the USB to the server and wait for a while till it loads the files. This will continue for about a couple of minutes as shown in the following screenshot.
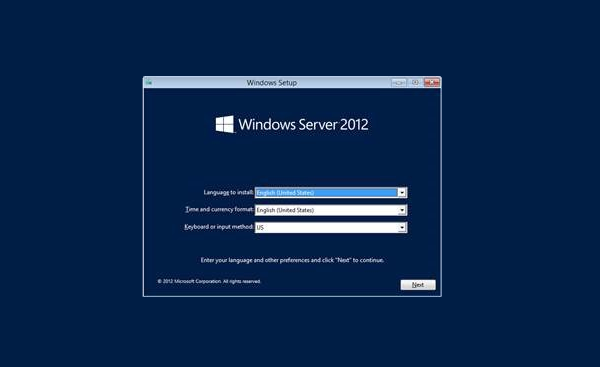
Step 4 − After the files are loaded, you will see the screen of language settings of installation, keyboard, time and currency format. Generally, all the default ones are also good enough to start with. Click Next.
