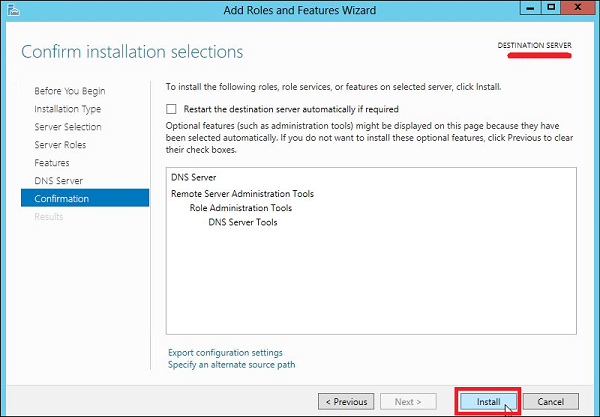
Step 7 − Click Install.
Step 8 − Wait until installation bar is complete.
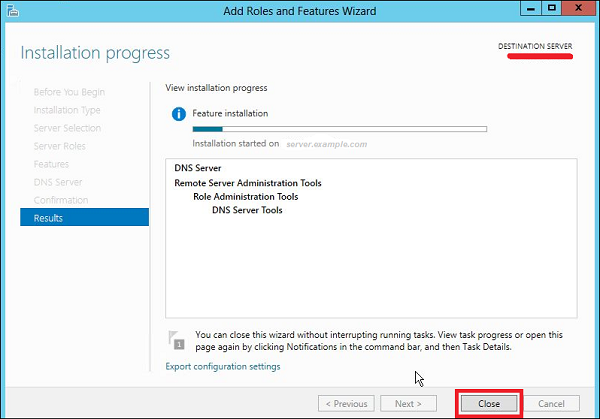
Once the installation is finished, click on Close.
Windows Server 2012 - Primary Zones
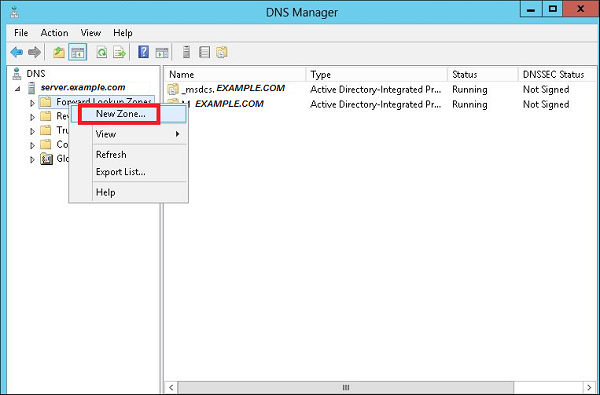
To manage DNS, we have to create a primary Zone because by default, there are no zones in order to manage the records.
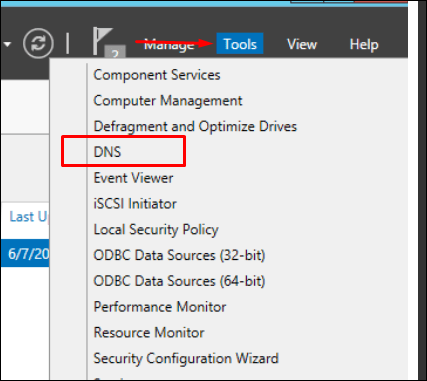
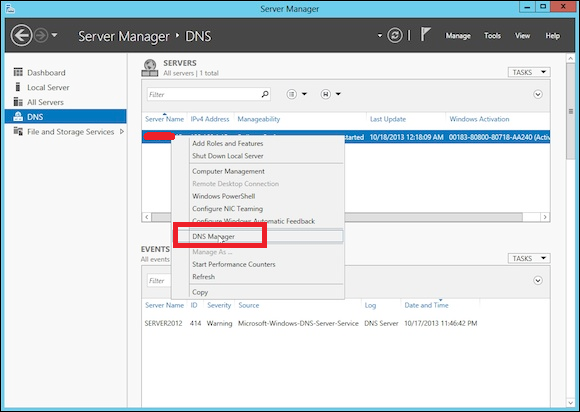
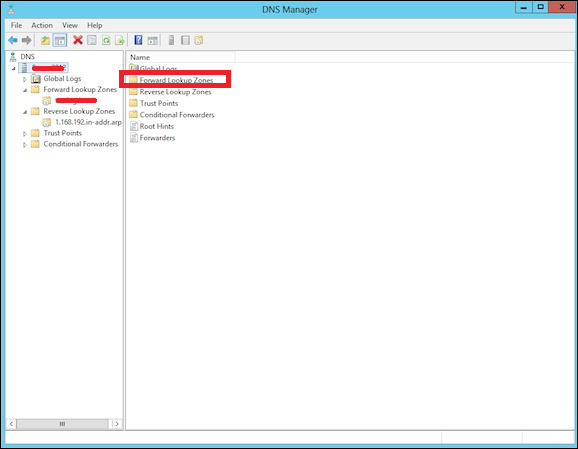
Step 1 − To manage DNS, go to Server Manager → Tools → DNS → Right click on “Forward Lookup Zone” → New Zone.
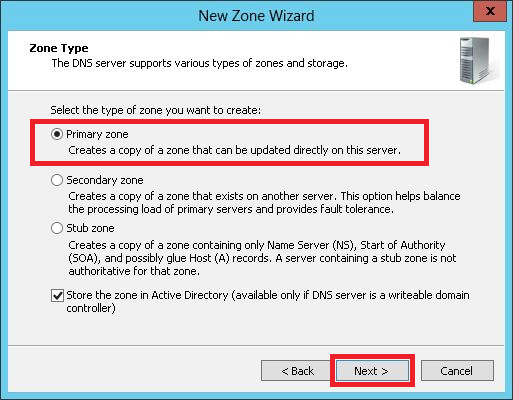
Step 2 − Select “Primary Zone” and then click Next.
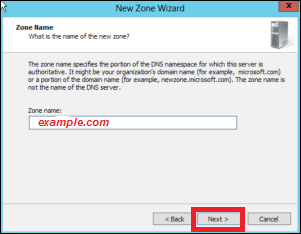
Step 3 − Enter the name of the primary Zone for which you want to manage the records.
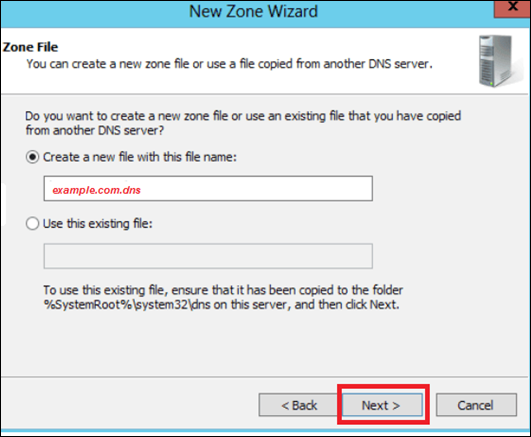
Step 4 − Select “Create a new file with this filename” option.
Step 5 − If you want to update the record of this zone manually, you have to select “Do not allow dynamic Updates”, as shown in the following screenshot.
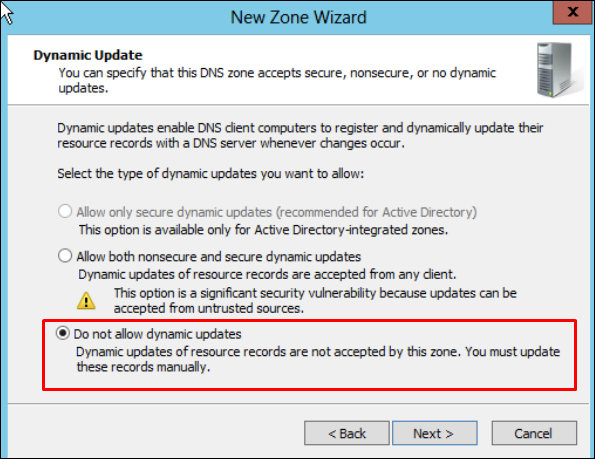
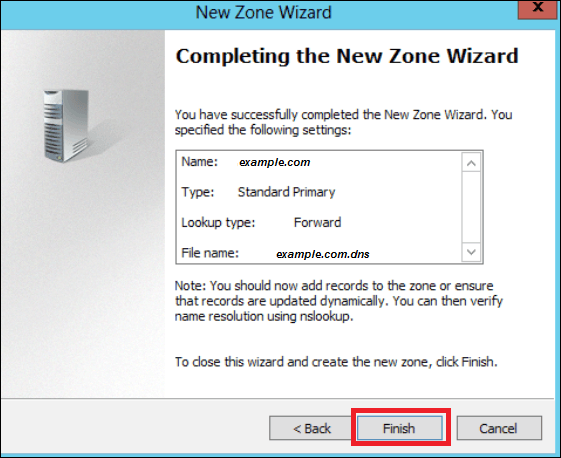
Step 6 − Click the Finish button.
Windows Server 2012 - Manage Records
As you know, in DNS you can add records according to your need and in Windows server 2012 as well. This doesn’t change too much from its earlier version of Windows Server 2008.
To add or manage records, we have to follow the steps given below −
Step 1 − Server Manager → DNS → Right click on the server that has a DNS record, which in our case is local.
Step 2 − Go to “Forward Lookup Zone”.
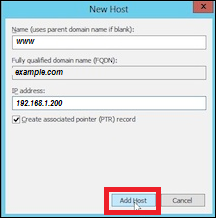
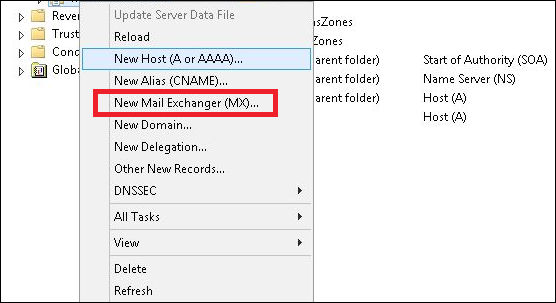
Step 3 − Right Click on the empty Field → New Host (A or AAAA) …

Step 4 − Name field and the subdomain name or case is WWW. → IP address we put is 192.168.1.200. So, when we will type-in our browser www.example.com, it will redirect us to 192.168.1.200.
Step 5 − To add a Mail Server Record, we add an MX record and then Right click → New Mail Exchanger as shown in the screenshot given below.
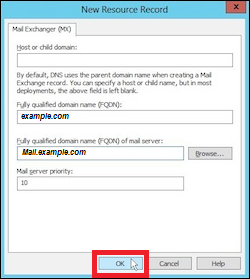
Step 6 − At “Fully qualifies domain name(FQDN) of mail server”, you enter the name of mail server → then in the “Mail server priority”, you enter a number. The smaller the number, the higher the priority.
Windows Server 2012 - IIS Overview
The IIS or Internet Information Services role is one of the most important services in Windows Server 2012. It has improved features as compared to its previous versions and it helps us to publish web application or webpages.
Let us now see how to install the IIS Role for which you will have to follow the steps given below.
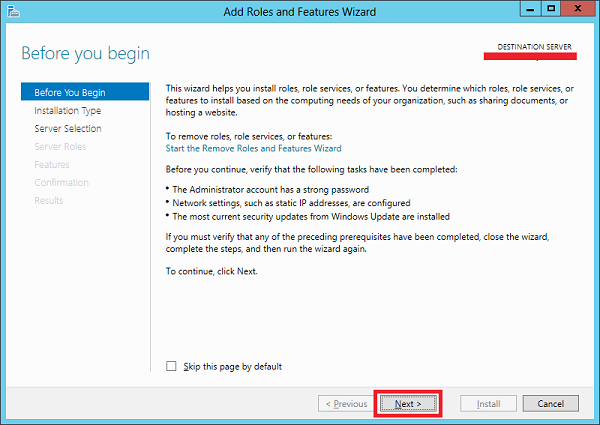
Step 1 − To Install IIS role, go to “Server Manager” → then Manage → and then to Add Roles and Features.

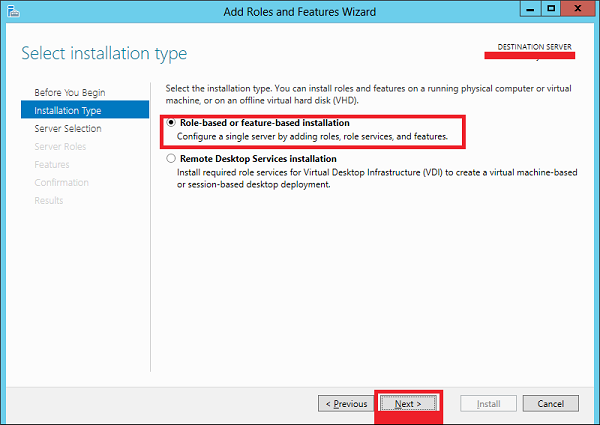
Step 2 − Click on Next in the window which pops up.
Step 3 − Select the Role-based or feature-based installation option and then click on Next.
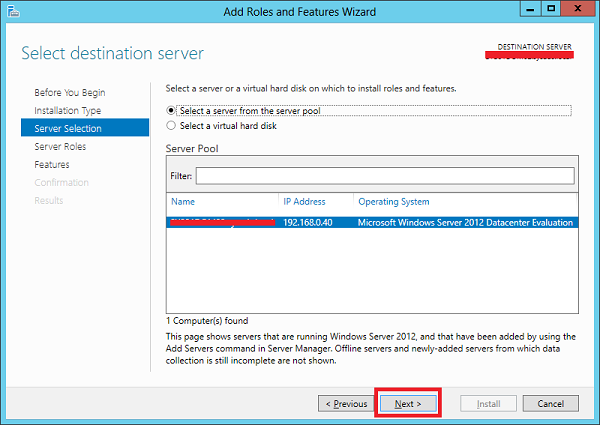
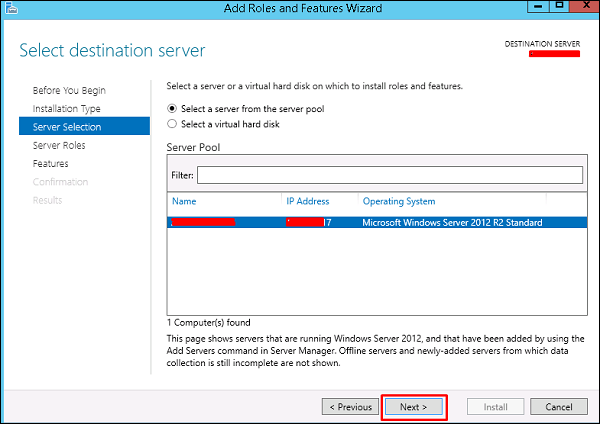
Step 4 − I will install a Local IIS role as it will Select a server from the server pool → then click on Next.
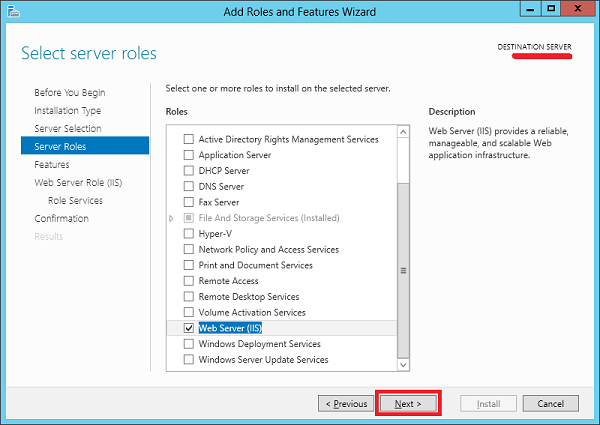
Step 5 − From the Roles lists, check the “Web server” (IIS) Server role → Next.
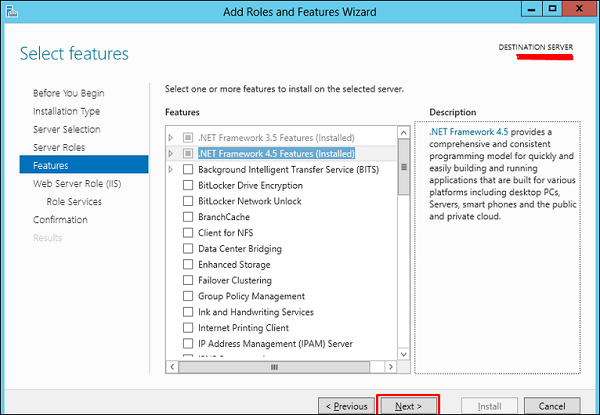
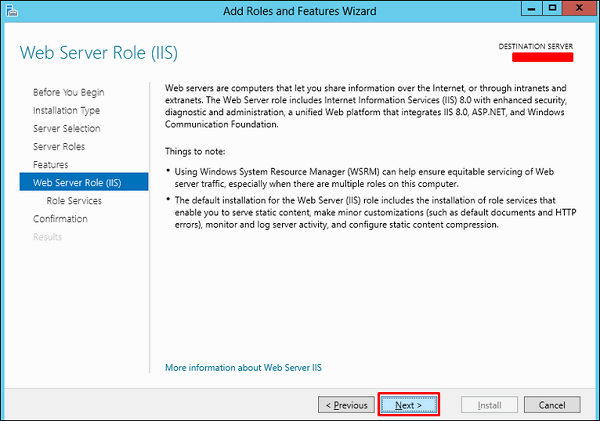
Step 6 − Click Next.
Step 7 − Click Next.
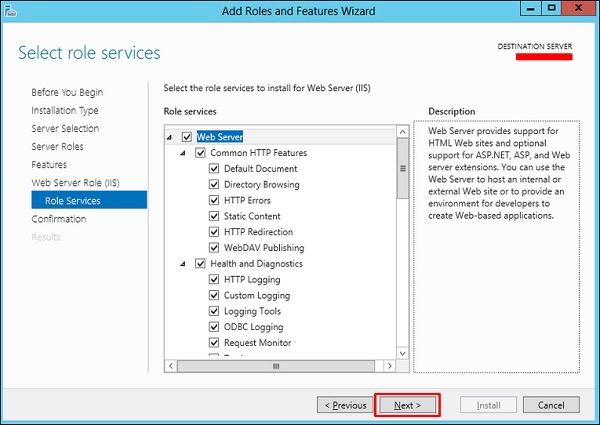
Step 8 − You can choose all the default setting or customize them according to you needs.
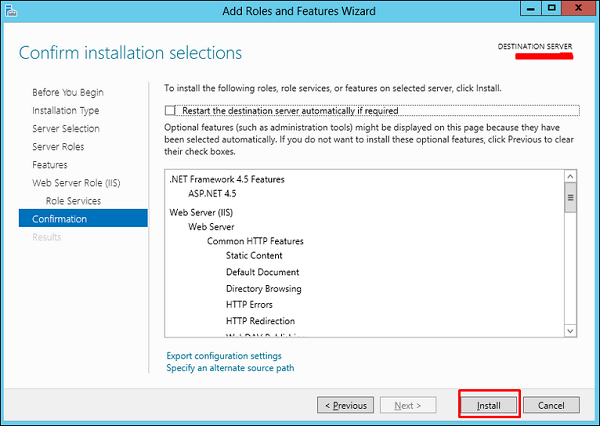
Step 9 − Click Install.
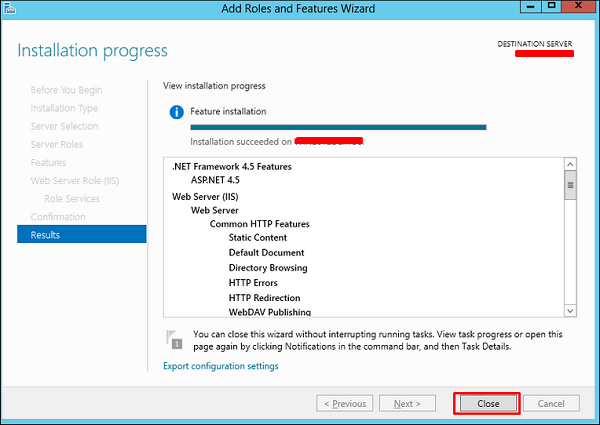
Step 10 − Wait until the Installation Wizard finishes. Once it is done click Close.
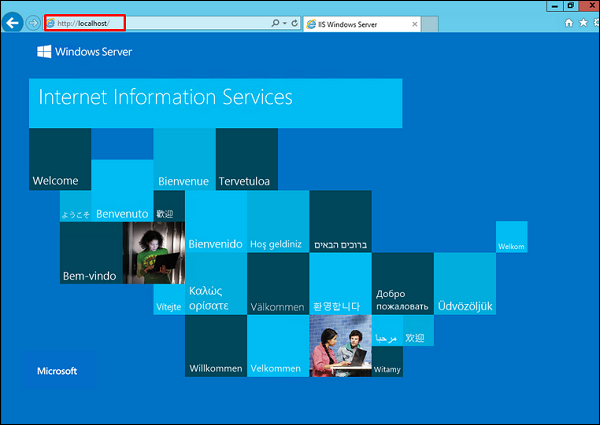
Step 11 − Check if your IIS is installed correctly. This can be done by opening your internet explorer and then typing http://localhost and you should be able to see the following screenshot.
Windows Server 2012 - IIS Security
The IIS (Internet Information Services) is facing internet all the time. So, it is important to follow some rules in order to minimize the risk of being hacked or having any other security issues. The first rule is to take all the updates of the system regularly. The second one is to create different application polls to this, which can be done by following the steps shown below.
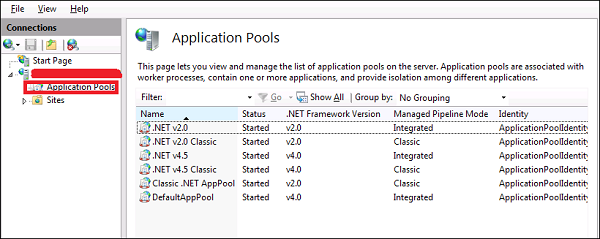
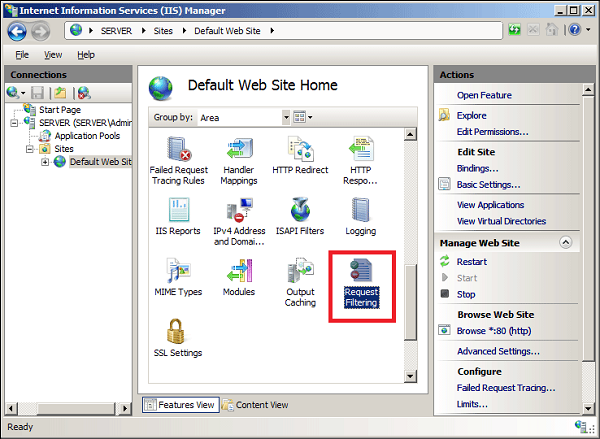
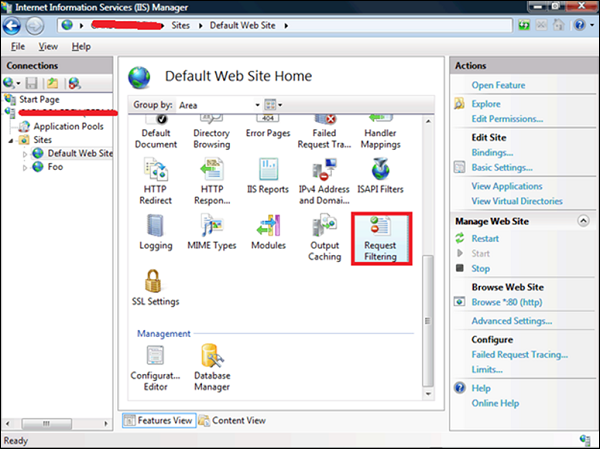
Step 1 − You have to go to: Server Manager → Internet Information Services(IIS) Manager → Application Pulls.
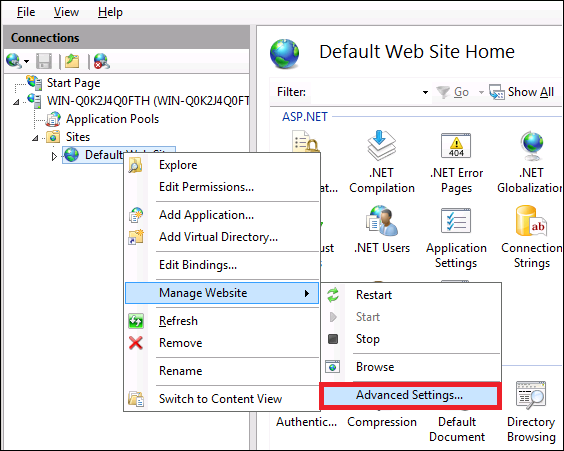
Step 2 − Click “Sites” → Right Click “Default Website” → Manage Website → Advance Settings.
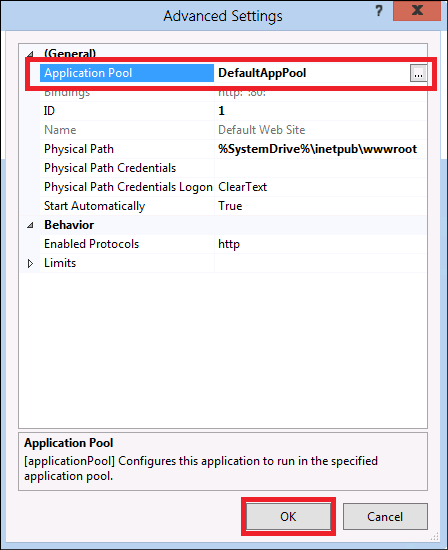
Step 3 − Select the Default Pools.
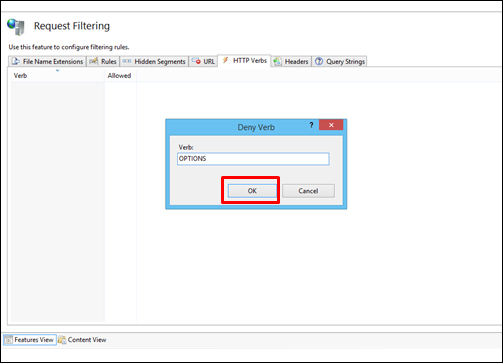
Step 4 − Disable the OPTIONS method, this can be done by following the path – Server Manager → Internet Information Services (IIS) Manager → Request Filtering.
Step 5 − In the action pane, select "Deny Verb" → Insert ‘OPTIONS’ in the Verb → OK.
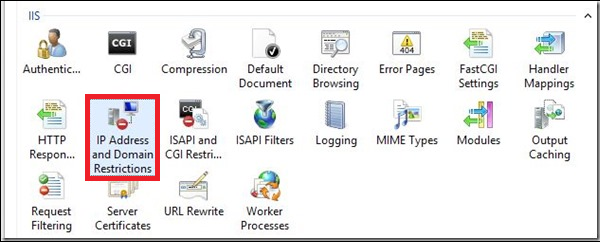
Step 6 − Enable Dynamic IP Restrictions blocks by going to – IIS Manager → Double click on "IP Address and Domain Restrictions" → Actions pane.
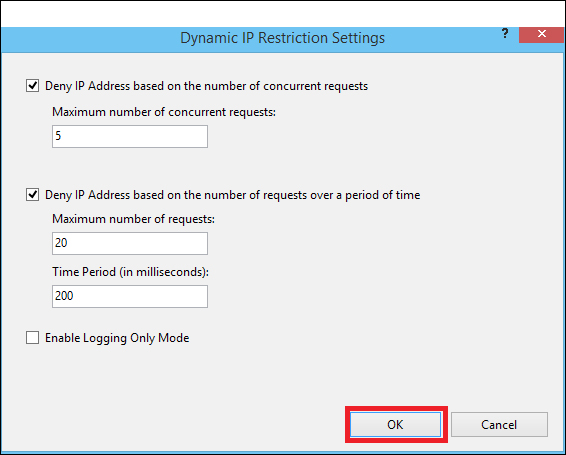
Step 7 − Then select "Edit Dynamic Restriction Settings" → Modify and set the dynamic IP restriction settings according to your needs → press OK.
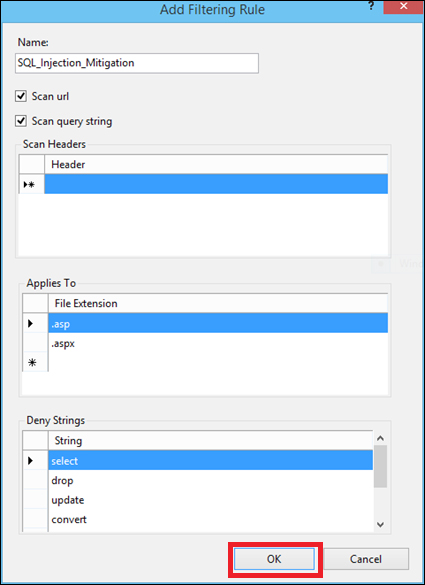
Step 8 − Enable and Configure Request Filtering Rules, to do this – IIS Manager → Double click on "Request Filtering" → Change to the Rules tab → Actions Pane.
Step 9 − Then select "Add Filtering Rule" → Set the required rules → Click OK.
Step 10 − Enable logging, to do this we need to follow this path – IIS Manager → select the specific site you want to configure → Logging.

Windows Server 2012 - Hyper-V
Virtualization is one of the most important technology feature and Microsoft has invested on this and the responsible role is called as Hyper-V.
Let us now see how to install the Hyper-V Role, for doing this we should follow the steps given below.
Step 1 − To Install DNS role go to “Server Manager” → Manage → Add Roles and Features.
Step 2 − Click Next.
Step 3 − Select the Role-based or feature-based installation option → click Next.
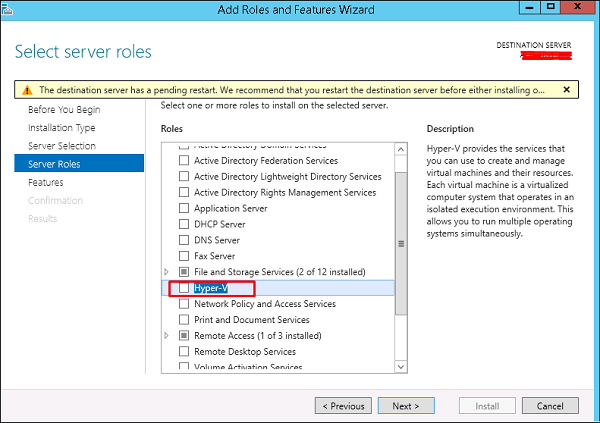
Step 4 − I will install a Local Hyper-V role as it will Select a server from the server pool → Next.
Step 5 − From the Roles lists, check the Hyper-V Server role → click Add Features on the popup windows which show up and then → Next.
Step 6 − Click Next.
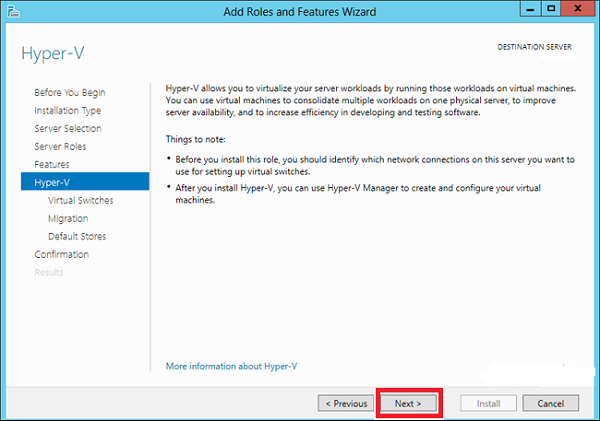
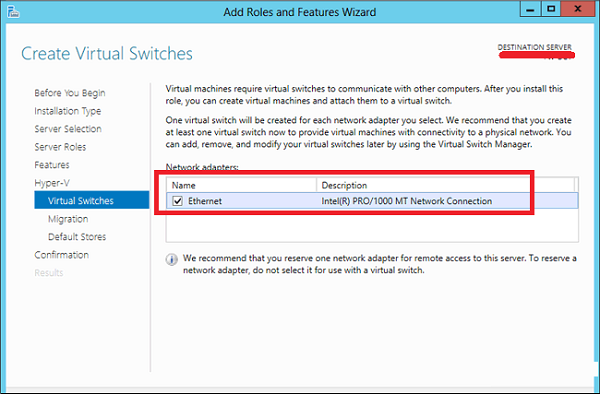
Step 7 − Choose your server’s physical network adapters that will take part in the virtualization → Next.
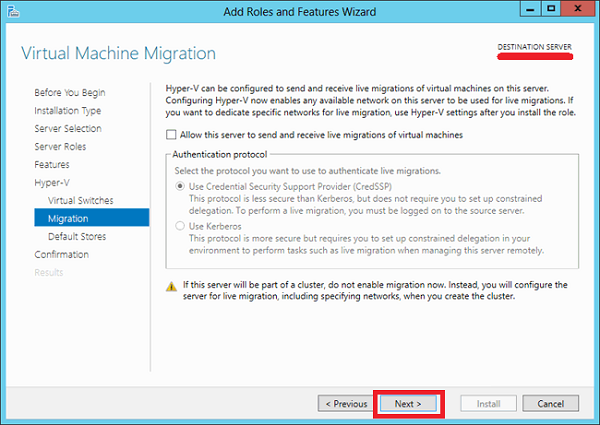
Step 8 − Under Migration, leave the default settings → Next.
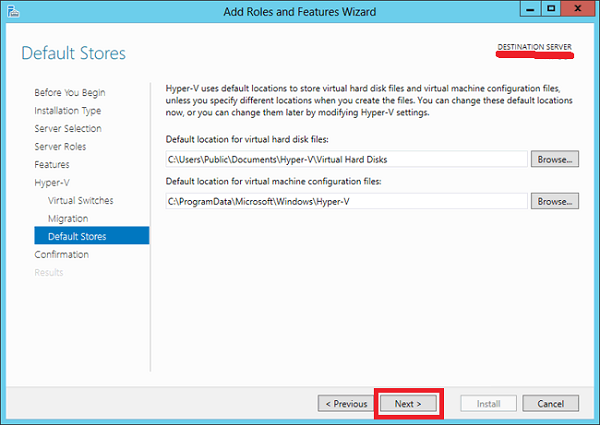
Step 9 − Choose the path where to save the file.
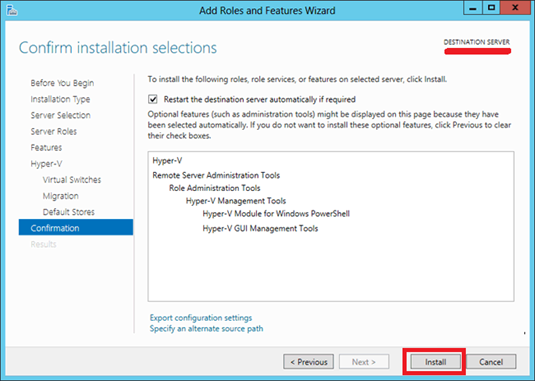
Step 10 − Click Install and wait for the installation bar to finish.
Advanced Configuration
In this chapter, we will see how to create a virtual machine. Firstly, we should open the Hyper-V manager and then follow the steps given below.
Step 1 − Open “Server Manager” → and then Click on “Hyper-V”.
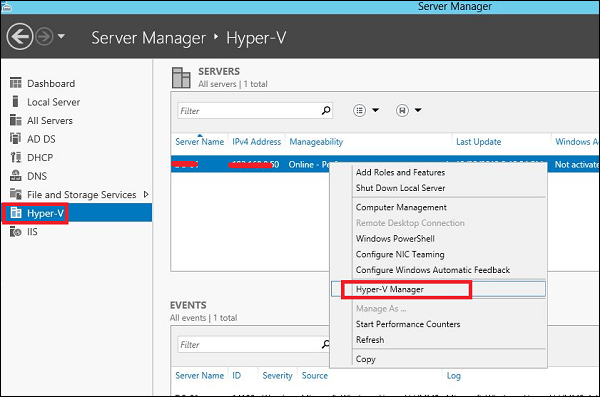
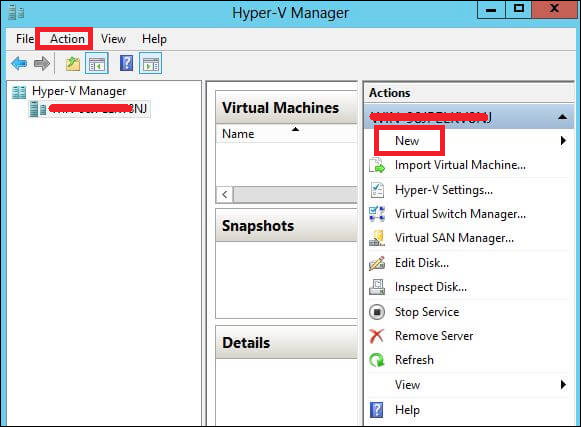
Step 2 − Click “New” on the Right side Panel or click on Action button in the options as shown in the screenshot below.
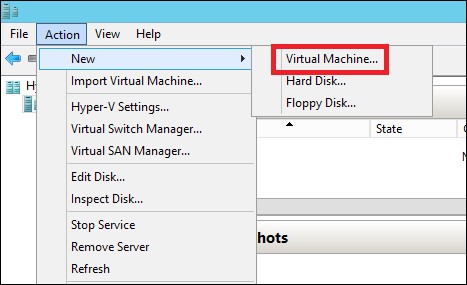
Step 3 − Double Click on the Virtual Machine option as shown in the following screenshot.
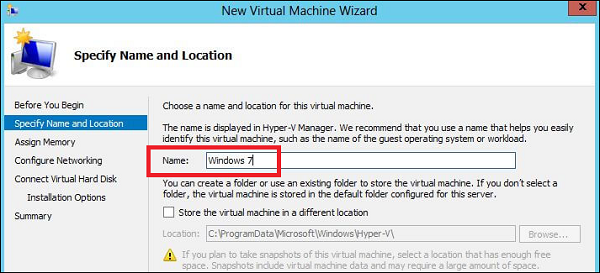
Step 4 − A new table will be open → Type the Name of your new machine and then click Next.
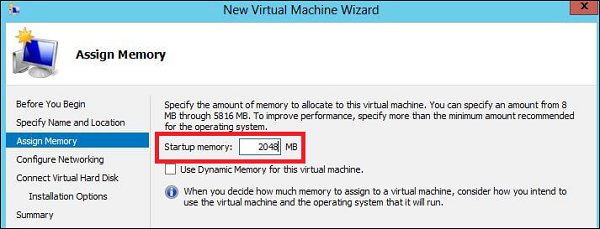
Step 5 − A new table will be open where you must allocate the memory. Keep in mind that you cannot choose more memory than what you have in your system.
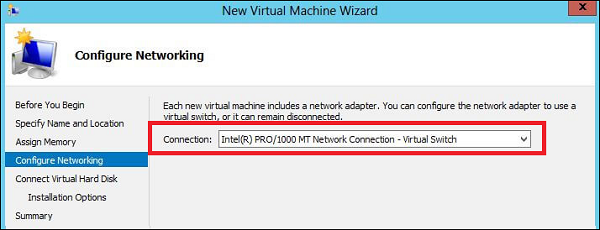
Step 6 − In the Connection dropdown box, choose you physical network adaptor and click Next.
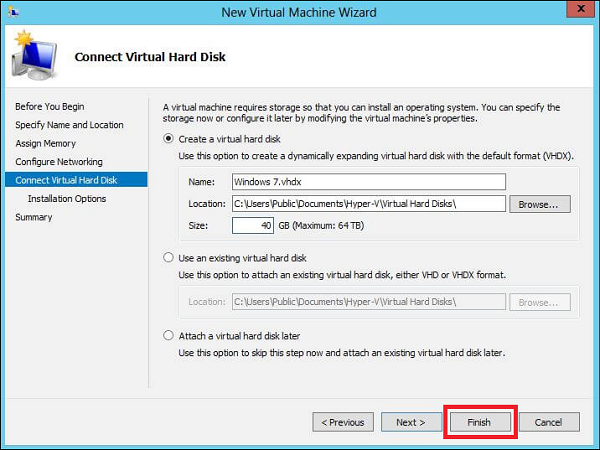
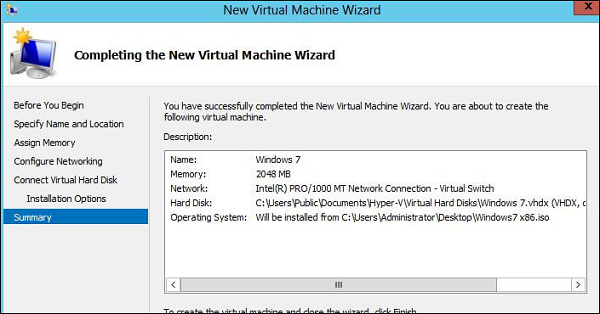
Step 7 − Now it is time to Create a Virtual Hard disk. If you already have one, choose the second option.
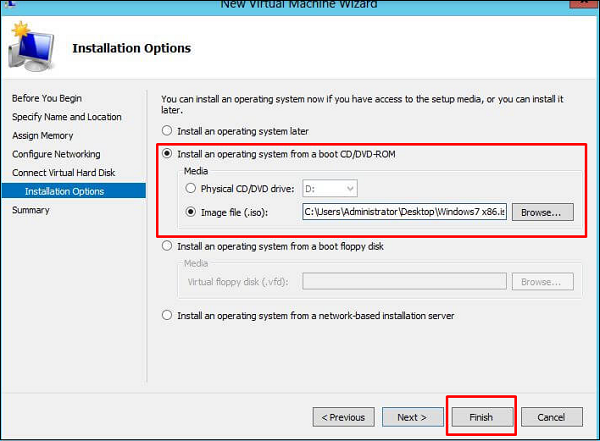
Step 8 − Select the Image of ISO that should be installed and then click Finish.
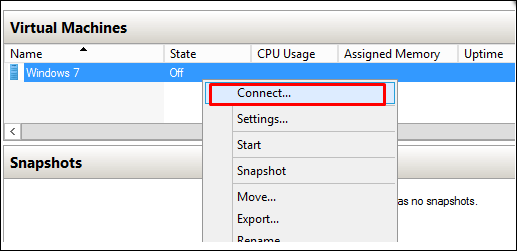
Step 9 − Connect to the Virtual machine. To do so, Right Click on the machine name and then → Connect.
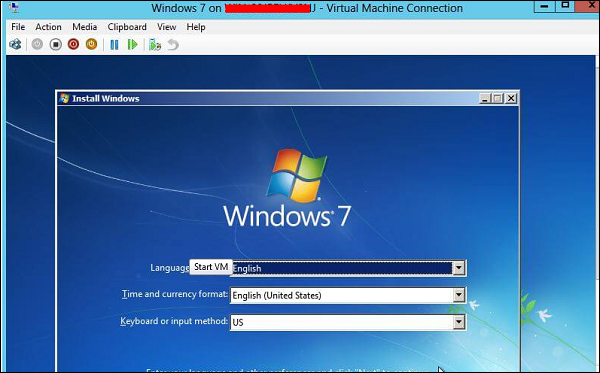
Step 10 − After that, the Installation of your ISO will continue.
Configure WSUS Role
As you know the WSUS (Windows Server Update Services) is an update service of Microsoft which allows the companies to test updates before installing to live environment.
To install this role, we should follow the steps given below.
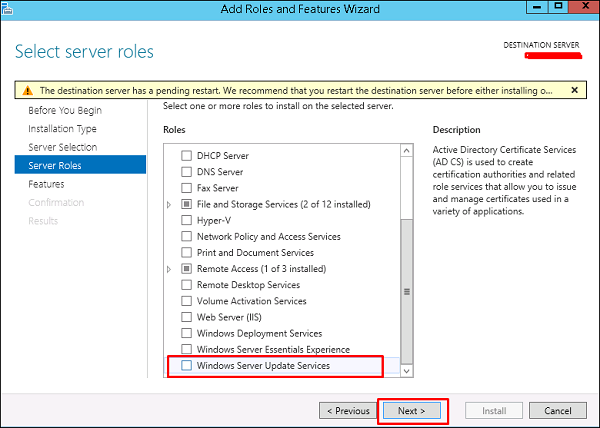
Step 1 − Go to “Server Manager” → Manage → Add Roles and Feature → Next → Select “Role-based or feature-Based-Installation → Select a server from the pool server and then → Next.
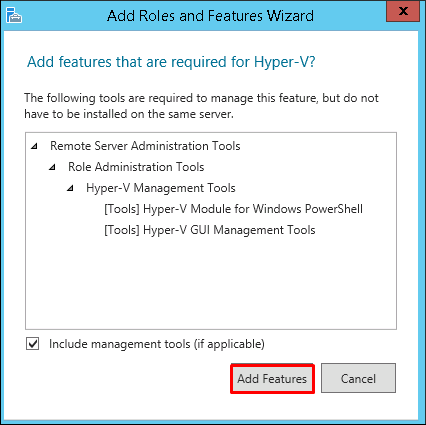
Step 2 − Check “Windows Server Update Service” a pop-up window table will come out → click “Add Features” then → Next and then again → Next.
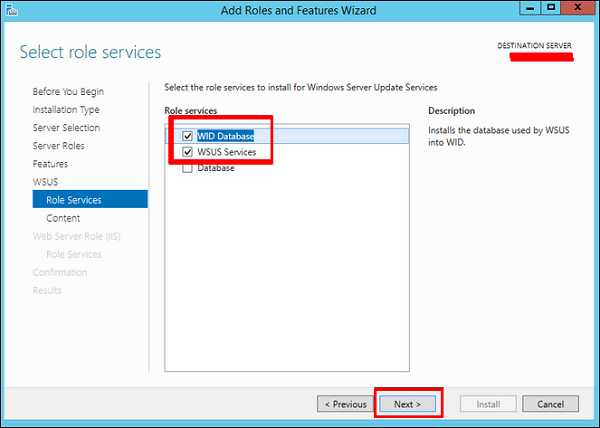
Step 3 − Check box of WID Database and WSUS Services
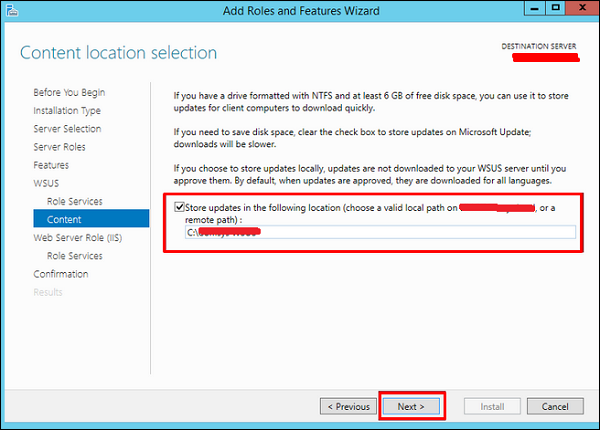
Step 4 − Choose the path for the content. If you have another partition other than C:, then install it there because C: can risk to become full → Next.
Once this is done, you should wait for the installation to finish.
WSUS Policies and Tuning
In this chapter, we will see how to configure WSUS and tune it. The following steps should be followed for configuring it.
Step 1 − When you open it for the first time, you should do it by going to “Server Manager” → Tools → Windows Server Update Services, then a Configuration wizard will be opened and then click → Next.

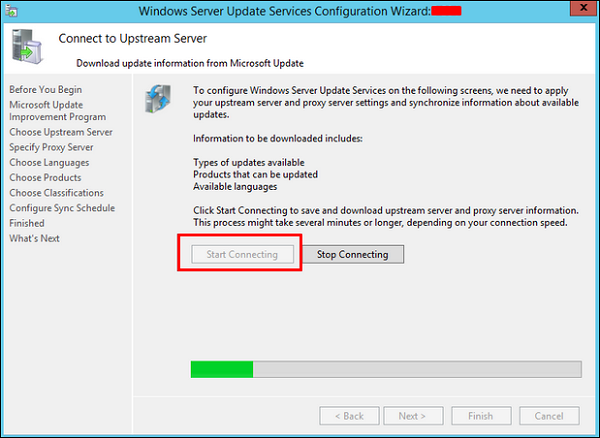
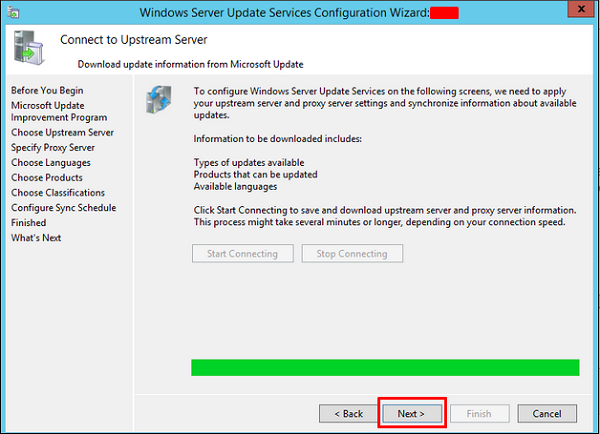
Step 2 − Click “Start Connecting” → Wait until the green bar is full and then → Next.
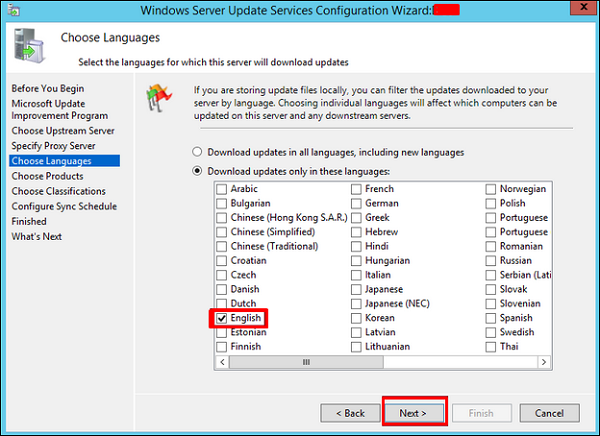
Step 3 − Check the box for which the updates want to be taken, I did for English and then → Next.
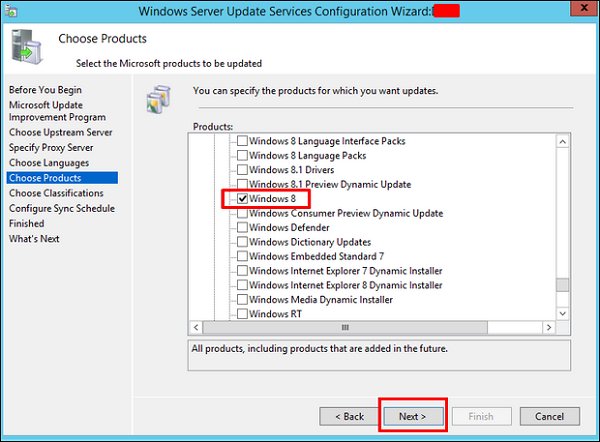
Step 4 − Check the box for all the products which you want to update. It is just for Microsoft products and it is recommended to include all the products related to Microsoft and then → Next.
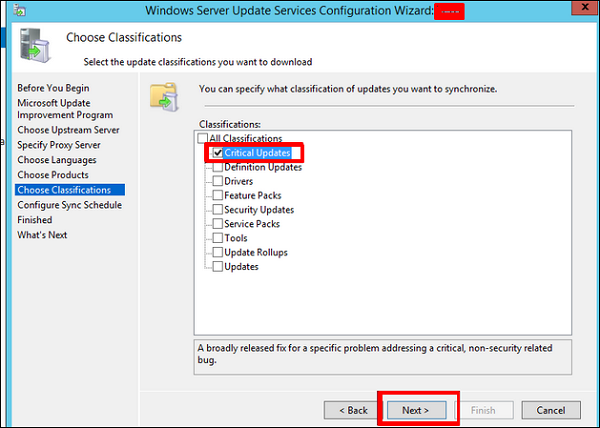
Step 5 − Choose the classification updated to be downloaded, if you have a very good internet speed, then check all the boxes, otherwise just check “Critical Updates”.
Step 6 − Now we should schedule the updates which I will recommend to do it automatically during night time → Next.

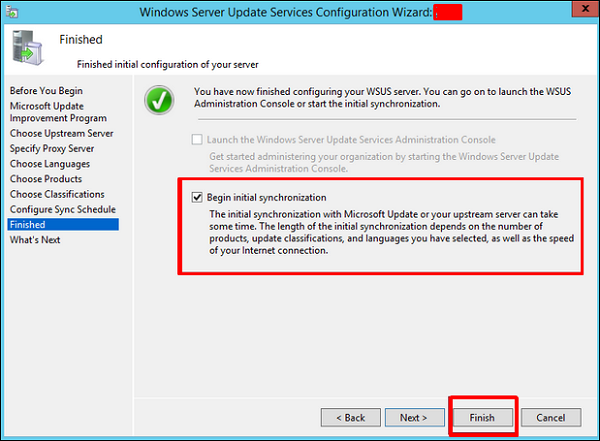
Step 7 − Check Box “Begin initial synchronization” → Finish.
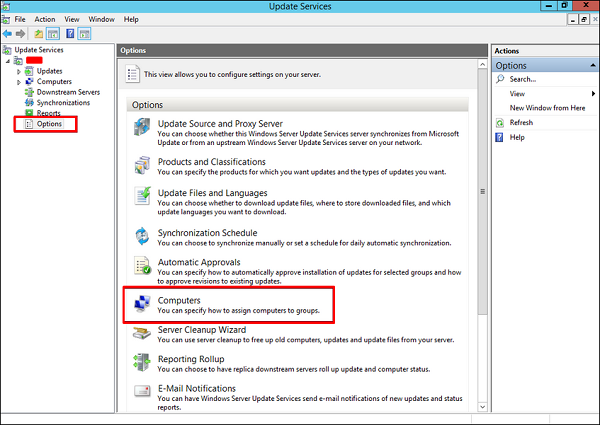
Step 8 − Now the WSUS console will be open and we must add the computer to WSUS. To do this, go to Options → Computers.
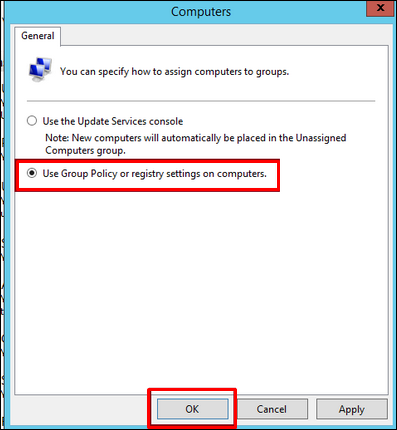
Step 9 − If you have a Domain Controler environment, choose the second option like in my case, otherwise choose the first option and then → OK.
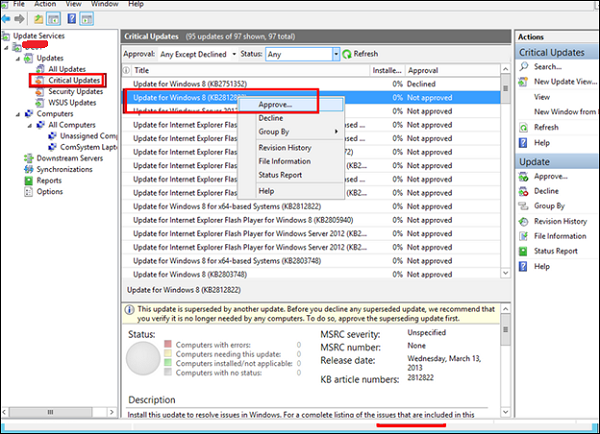
Step 10 − After you have done all this, you should approve updates, which is similar like how it is done in the previous version. To do this – Right click on the updates → Approve as shown in the screenshot given below.
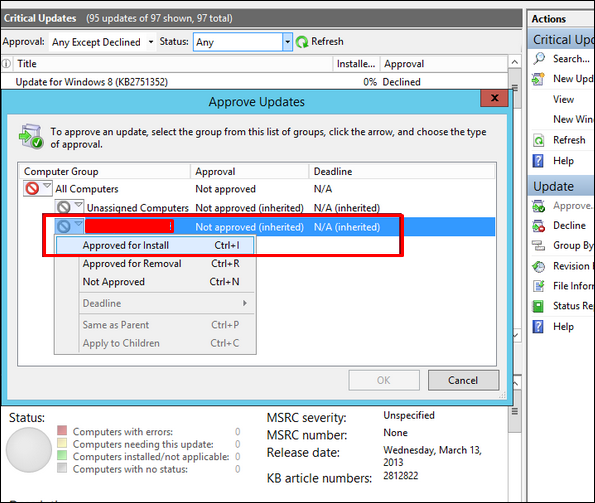
Step 11 − Then you should click Approve for install as shown in the screenshot given below.
Windows Server 2012 - Sharing of Files
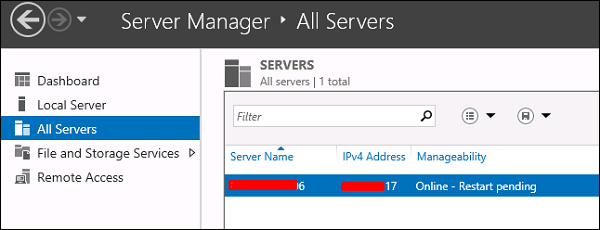
Another important service for Windows Server is Sharing Files and for this purpose the Windows Server 2012 has – File and Storage Services, which is found in Server Manager on the left pane as shown in the screenshot given below.
Now let us see how to create a Share in the system with its respective rights. To do this, we should follow the steps given below.
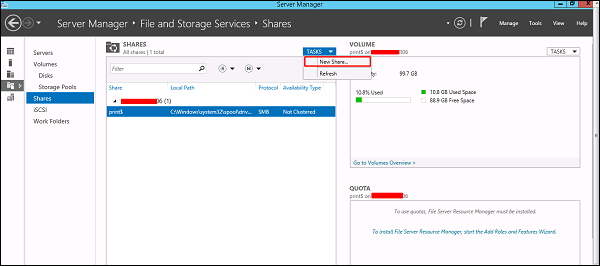
Step 1 − Click Server Manager → then click on File and Storage Services in the Server Manager sidebar → click on Shares → click on the Shares drop-down list → click on New Share.
Step 2 − This will open the New Share Wizard → From here, select a type of share → I will create a very basic SMB share, so click on SMB Share – Quick. We can later configure the user rights of this share.

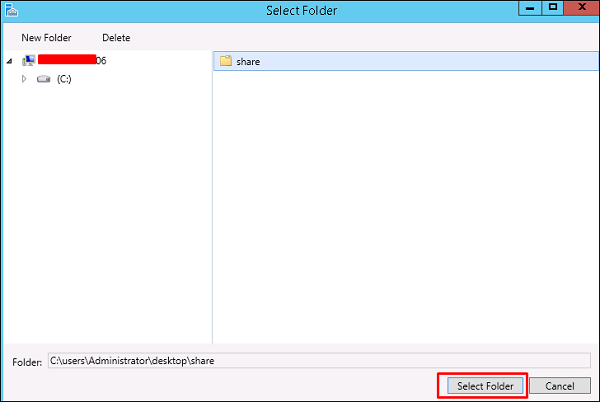
Step 3 − Click “Type a custom path” → click on Browse button.

Step 4 − Select the folder that you want to share → Click Select Folder.
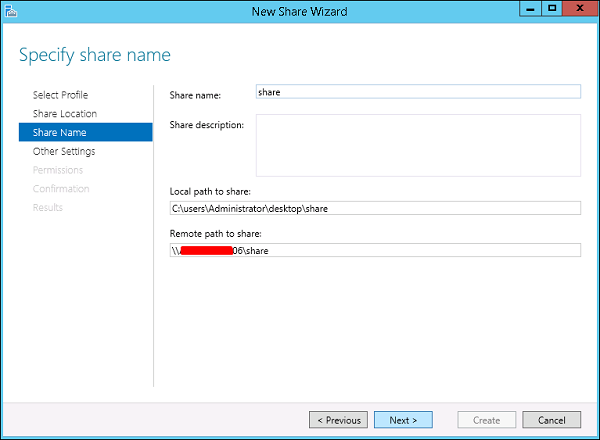
Step 5 − Click Next.
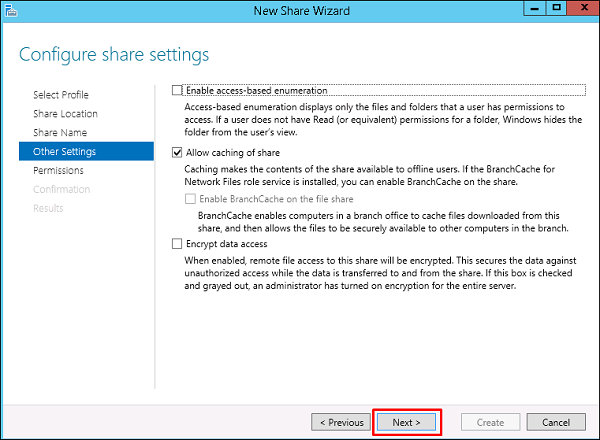
Step 6 − You can choose one of the three options as per your need. The explanations are also mentioned alongside the check boxes, once selected → Next.
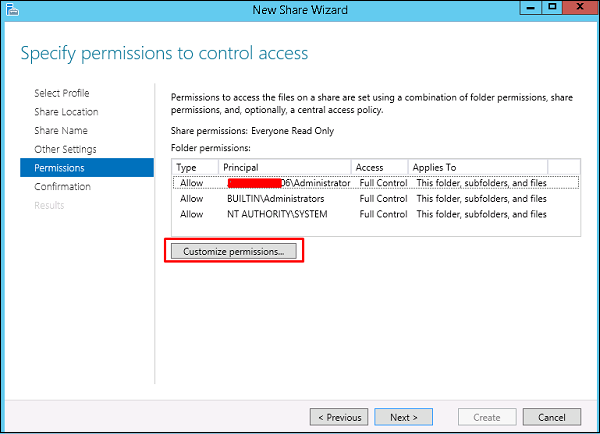
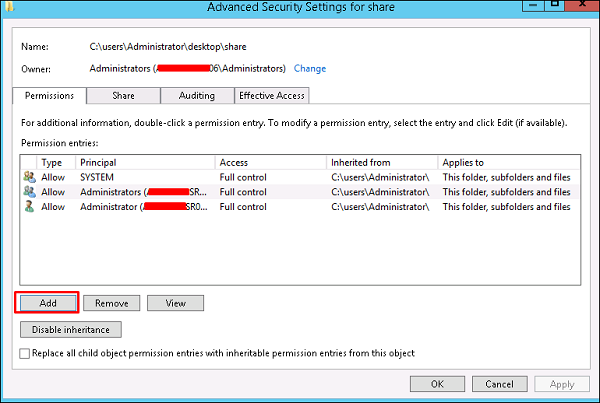
Step 7 − Click on Customize Permissions to authorize the rights that your users need to have.
Step 8 − Click on Add if you would like to add other users.
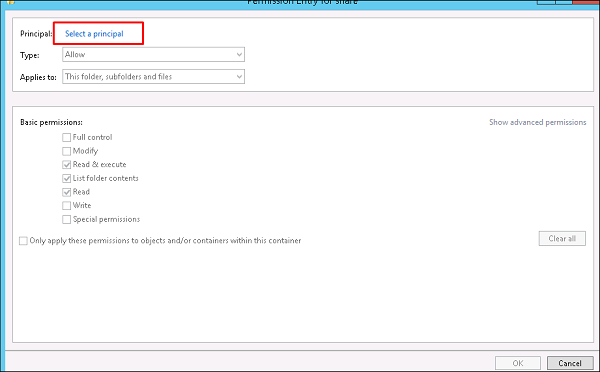
Step 9 − Click on Select a principal.
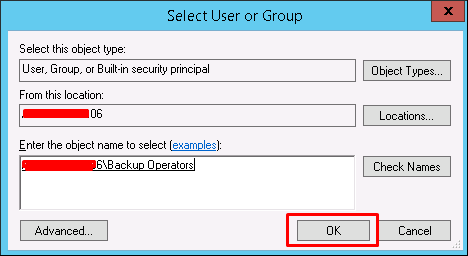
Step 10 − We should give rights that can be done by entering the object name, which is Backup Operator in this case and then → OK.
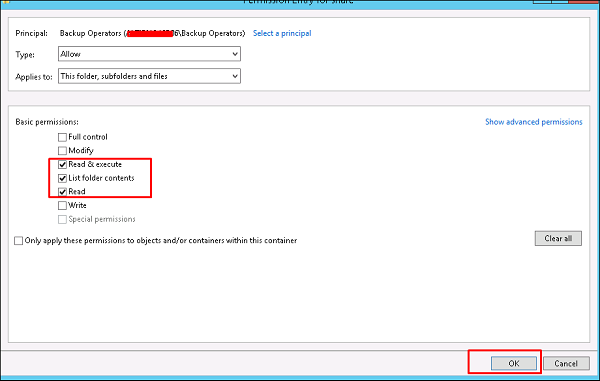
Step 11 − To this user we will give Read\Write rights, for that we will check the respective boxes and then → OK → OK → Next.
Step 12 − Click on Create.

Windows Server 2012 - File Manager
Like its previous versions, the present Windows Server 2012 version has a File Server Resource Manager Role. As you know, this is a role that helps system administrators to manage shared folders in the features link in setting up limits or file extension restrictions. To install it, we should follow the steps given below.
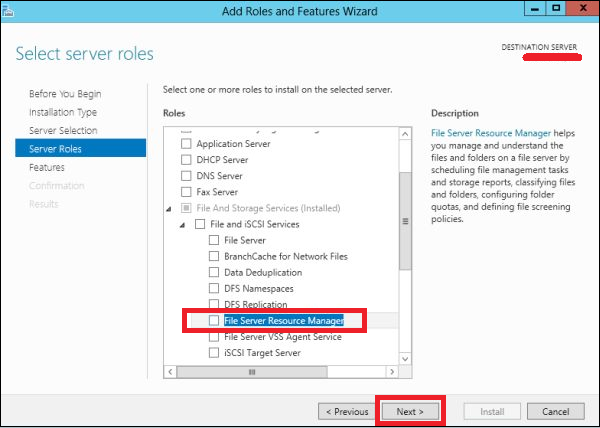
Step 1 − Go to Server Manager → Manage → Add Roles and Features → Next → Check on the Role-based or feature-based installation box → Check on the Select a server from the server pool box → Next.
Then, at the list of the roles find File and Storage Services and expand it. After this, expand the Files and iSCSI Services → Check on the File Server Resource Manager box and then a pop-up window will open.
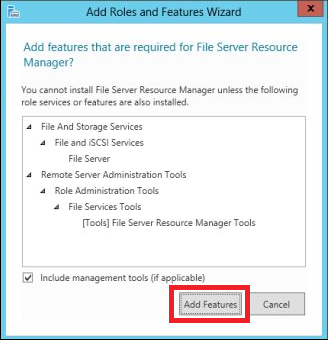
Step 2 − Click on Add features and then → Next.
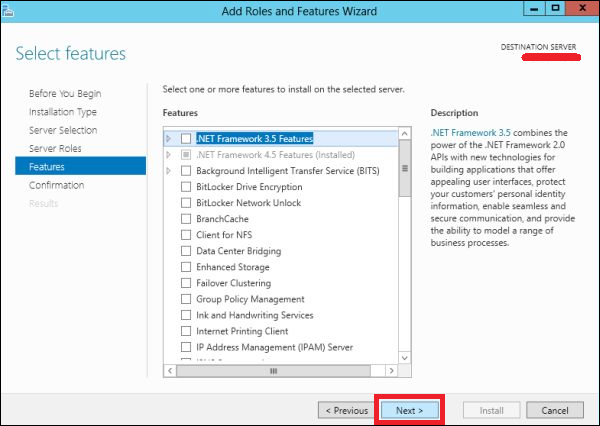
Step 3 − Click the Next button.
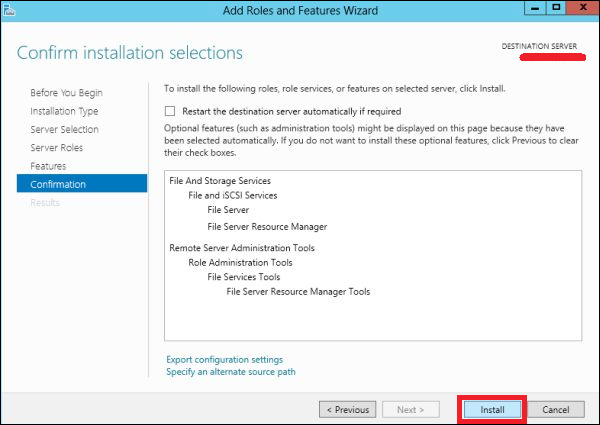
Step 4 − Click the Install button.
Now that we installed the File Server Resource Manager, let us open it by following the path given below.
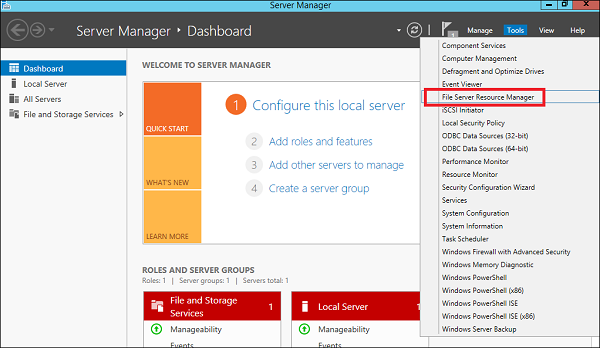
Step 1 − Click on Server Manager → Tools → File Server Resource Manager.
To set quota to a folder, we should follow the steps as below.
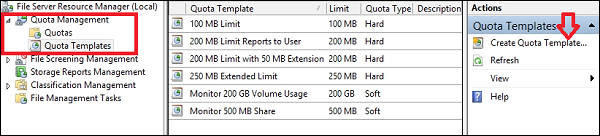
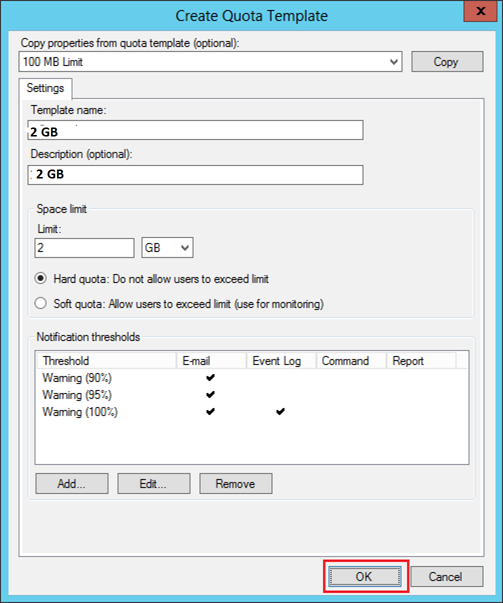
Step 2 − On the left panel click on Quota Management → expand Quota Templates → click on Create Quota Template… on the right-hand side panel as shown in the screenshot given below.
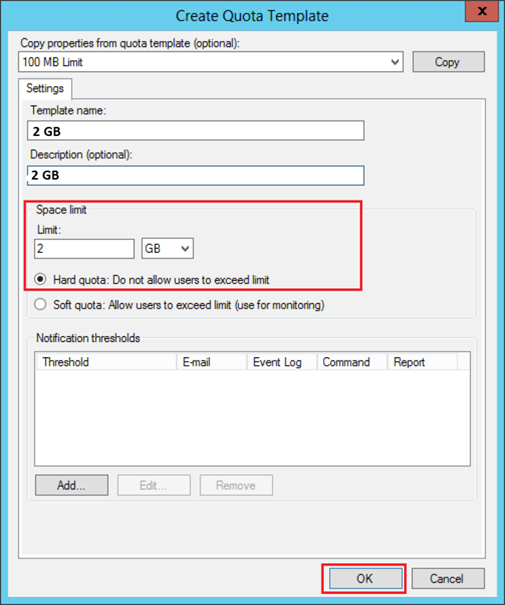
Step 3 − A new table will be opened, where the most important aspect to put is Space Limit depending on the need. Here, we will put 2GB and then → OK.
Step 4 − You must put the threshold for it and once the folder reaches the capacity, it will send you a notification where you will have an option to put the email.
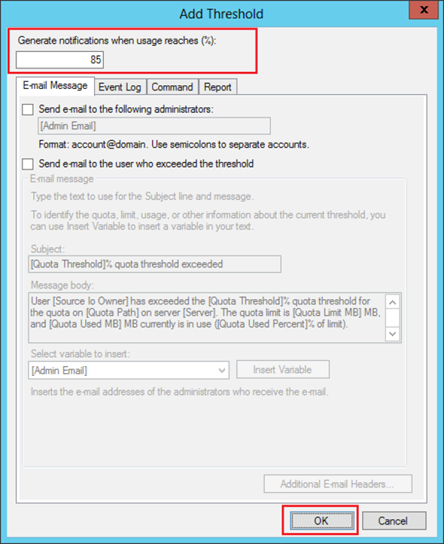
Step 5 − Click Ok.
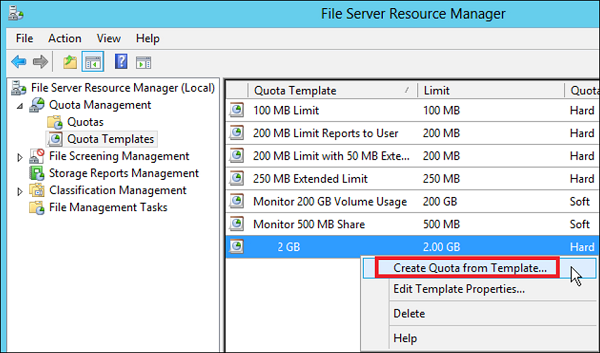
Step 6 − Then to attach this quota to a folder – Right Click on the template → click on Create Quota from Template…
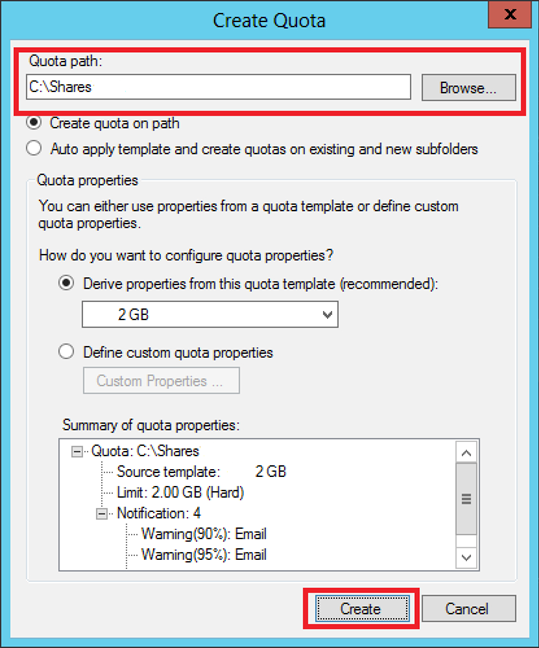
Step 7 − Click on Browse… and then select your folder → Create.
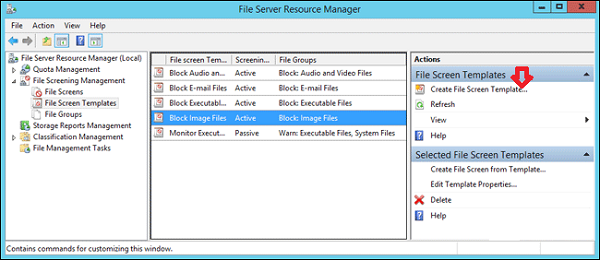
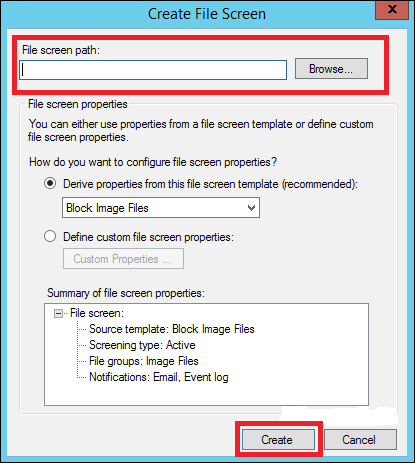
Step 8 − To put a file restriction to your folders, you can go to the left pane File Screening Management → File screening templates → Click on the left panel Create File Screen Template…
Step 9 − Click on Browse… and find the folder that you want → Create.
Windows Server 2012 - Print Server
In this chapter, we will see how to install a Print Server which plays some very important roles for the system administrator and the management. We should follow the steps given below.
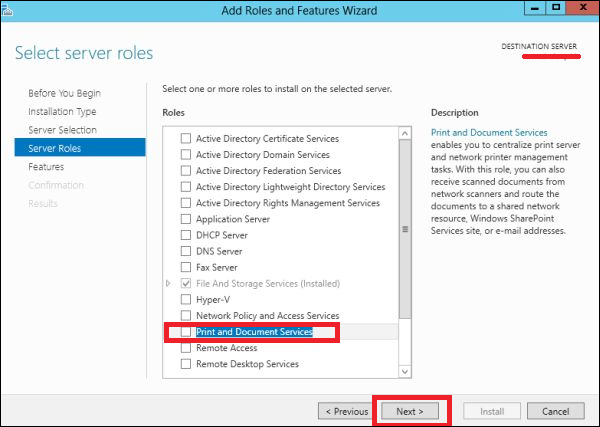
Step 1 − Go to Server Manager → Manage → Add Roles and Features → Next → Check on the Role-based or feature-based installation box and → Check on Select a server from the server pool and then → Next.
Once it is done then, at the list of the roles find Print and Document Services → A popup window will open.
Step 2 − Click on Add features and then → Next → Next → Next.

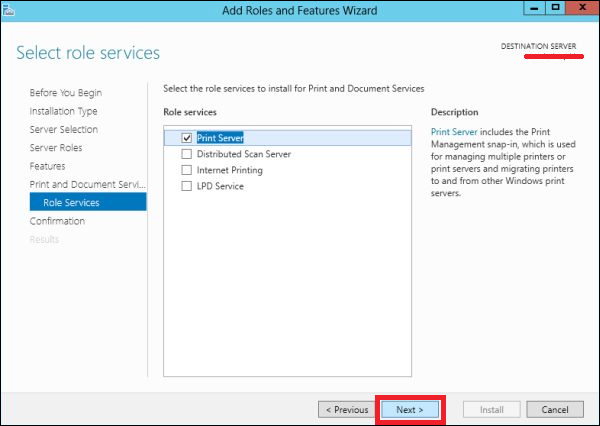
Step 3 − Check on the Print Server box and → Next.
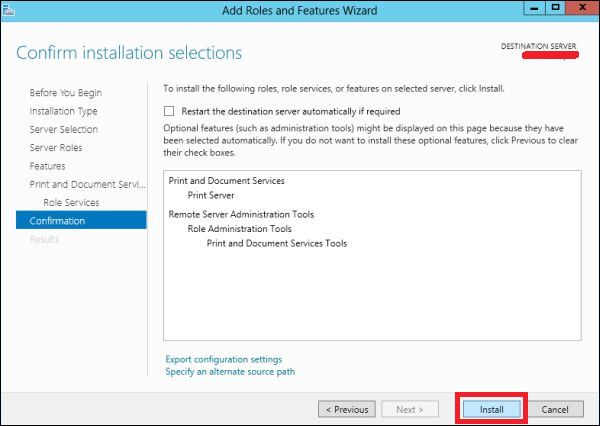
Step 4 − Click Install.
Windows Server 2012 - Easy Printing
Easy Printing is a feature which allows the client that connects via RDS to print over the network. It is installed in Windows server 2012 by default. Easy Printing is basically where the printer device is defined on the client system and a printer is connected directly via the network. All configuration is done via Group Policy Objects.
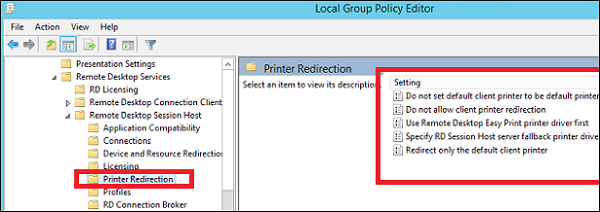
The configuration settings can be found at Computer Configuration – Administrative Templates – Remote Desktop Services – Printer Redirection.
For User Configuration, it will be have the same path – Administrative Templates – Remote Desktop Services – Printer Redirection.
In administration, another important aspect is to set the priority for the printer, so the users have the same printer installer and can print as per their priorities. In this, the users printing with higher priorities overpass the printing will lower priorities.
To do so, you need to add different logical printers and then add then as per the users or departments that have different priorities.
To do this, firstly let us add a printer to the print server by following the steps given below.
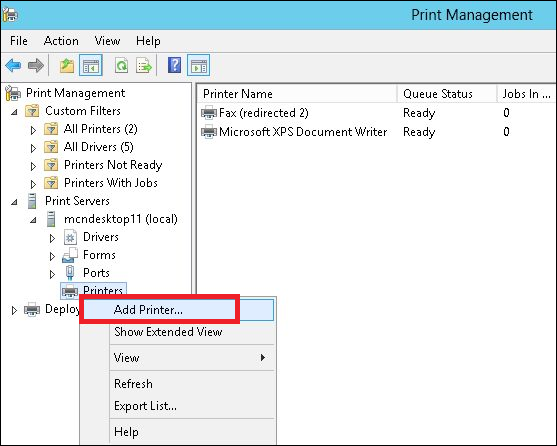
Step 1 − Click on Server Manager → Tools → Print Management → then on the left panel click Print Servers → then right click on Printers and → Add Printer.
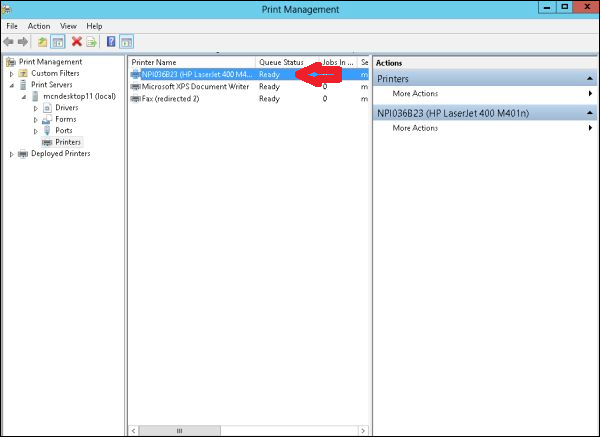
Step 2 − Next, follow the wizard to add the network printer like you do for a normal workstation and at the end this printer will be shown in the Printer Management.
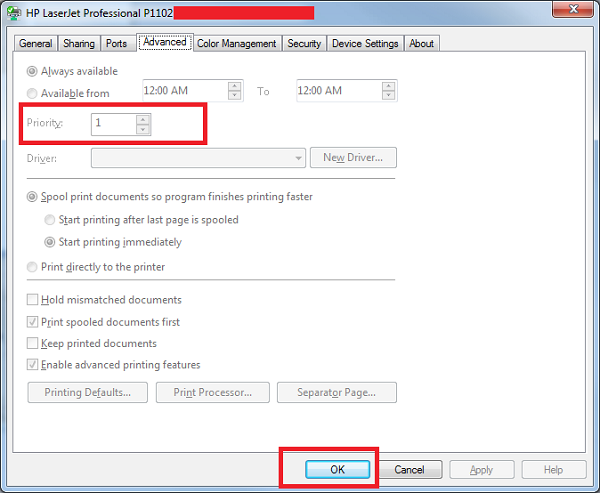
Step 3 − Now that we have installed the printer, we can set the priority on this printer – Right click on the printer → Advanced → put a number at Priority from 1-99 → OK.
Configure Print Drivers
If we want to add other additional drivers, so that our clients find them easier to install a printer on their own. We must follow the steps given below −
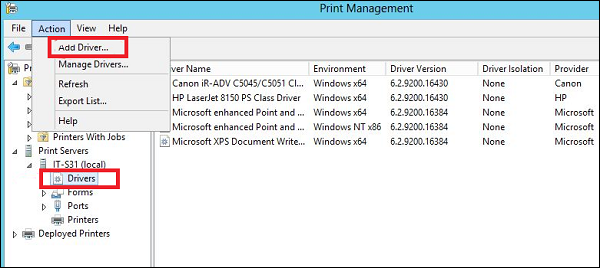
Step 1 − Go to, Server Manager → Tools → Print Manager → Action → Add Driver…
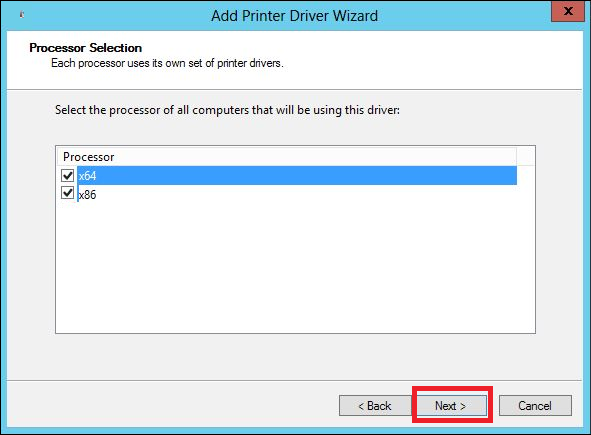
Step 2 − Check both boxes → Next.
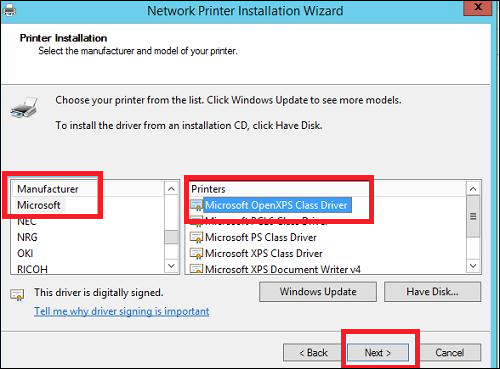
Step 3 − Choose the drivers Path to be installed and then → Next.
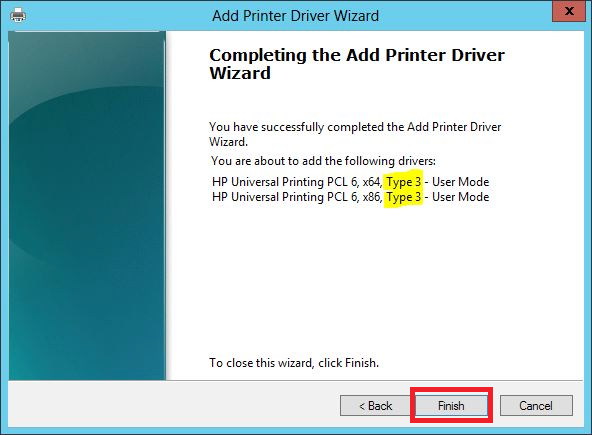
Step 4 − Click the Finish button.
Windows Server 2012 - Network Services
Windows has many network services too and you might already be knowing that it can become a router or a VPN Server too. Let us see how to use the Windows server 2012 as a router by installing the Remote Access role to it.
PS − Server should have 2 network cards – One inside the LAN and the other facing the internet.
To add the Remote Access role, we should follow the steps given below.
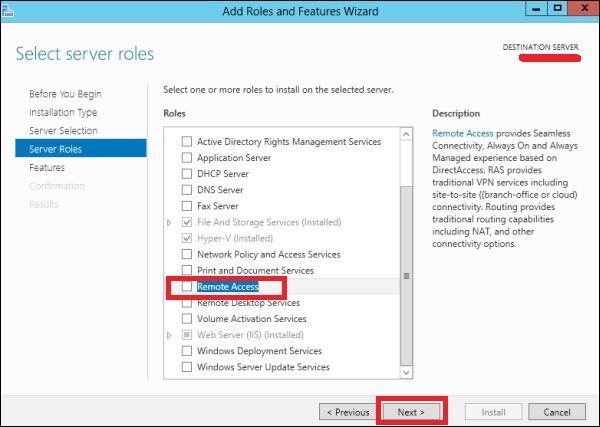
Step 1 − Go to, Server Manager → Manage → Add Roles and Features → Next → Check Role-based or feature-based installation → Check Select a server from the server pool → Next.
Once all of it is done, then at the list of the roles find Remote Access and check it → A pop-up window will open.
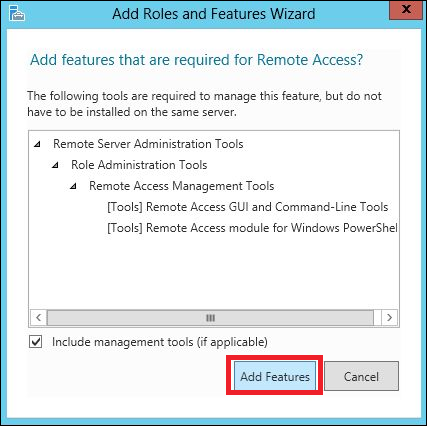
Step 2 − Click “Add Features” → Next.
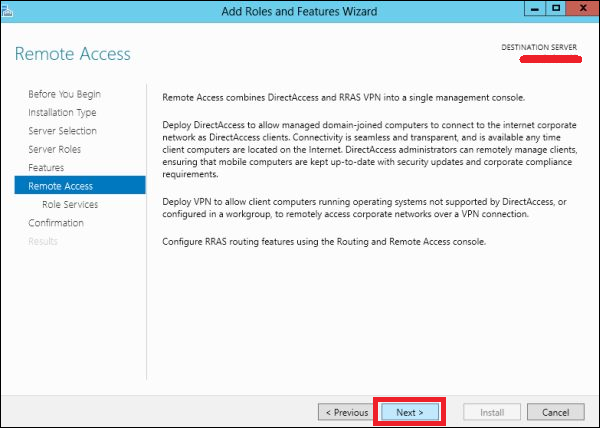
Step 3 − Click Next.
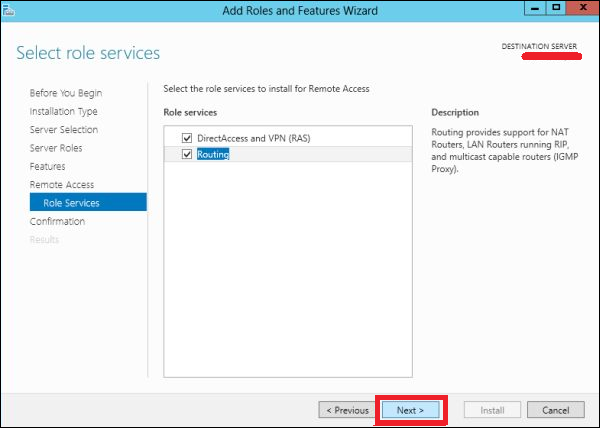
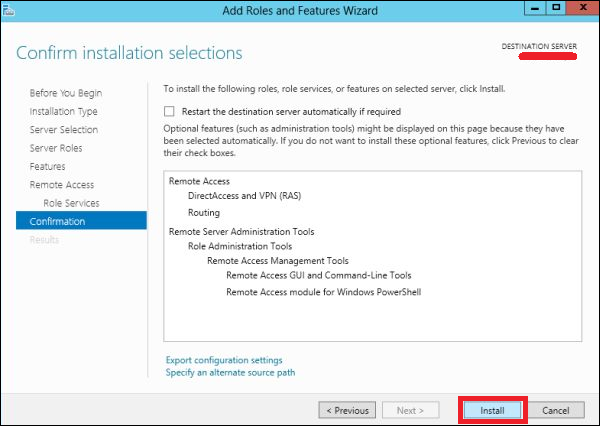
Step 4 − Check on the DirectAccess and VPN(RAS) and Routing check boxes.
Step 5 − Click Install and wait for it to be installed completely.
After the installation is done, let us now see the setup of the router. For this, we need to follow the steps given below.
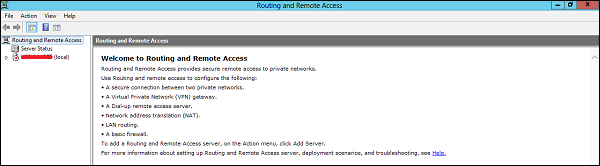
Step 1 − Go to, Server Manager → Tools → Routing and Remote Access.
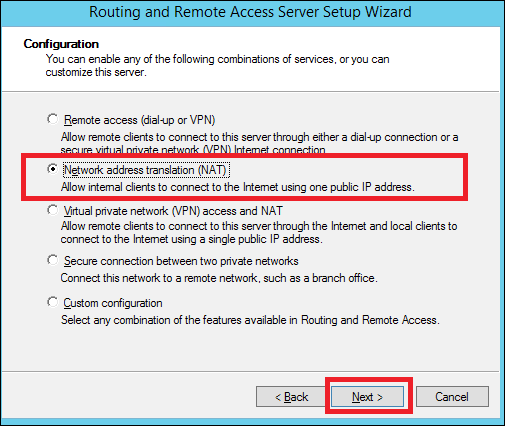
Step 2 − Right click → and then again click on Configure and Enable Routing and Remote Access as shown in the following screenshot.
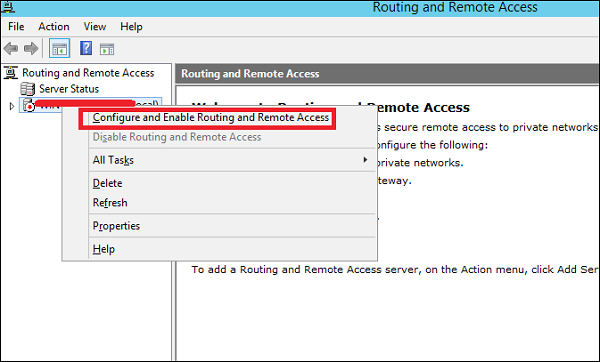
Step 3 − Select the Network address translation (NAT) option → Next.