Windows Server 2012 - Resource Monitor
Resource Monitor is a great tool to identify which program/service is using resources like program, applications, network connection and memory usages.
To open Resource Monitor, go to Server Manage → Tools.
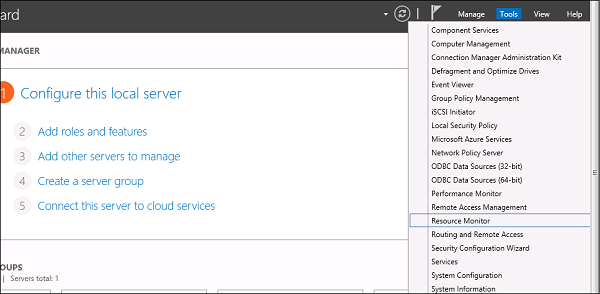
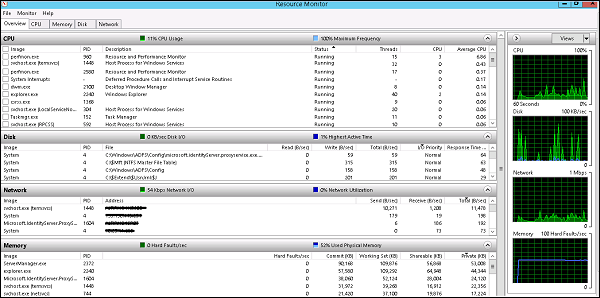
Click on “Resource Monitor”, the First Section is “Overview”. It tells how much CPU is consuming every application and on the right side of the table, it monitors in real time the chart of CPU usage. The Memory tells how much memory every application is consuming and in the right side of the table it is being monitored in real time in the chart of CPU usage.
The Disk tab splits it by the different hard drives. This will show the current Disk I/O and will show the disk usage per process. The network tab will show the processes and their network bytes sent and received. It will also show the current TCP connections and what ports are currently listening, IDs too.
Windows Server 2012 - Active Directory
In this chapter, we will see how to Install Active Directory in Windows Server 2012 R2. Many of us who have worked with the previous version run DCPROMO.EXE to install it, but in the 2012 version, it is recommended by Microsoft not to use it anymore.
To continue with Installation follow the steps given below.
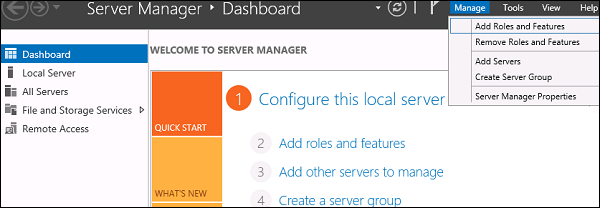
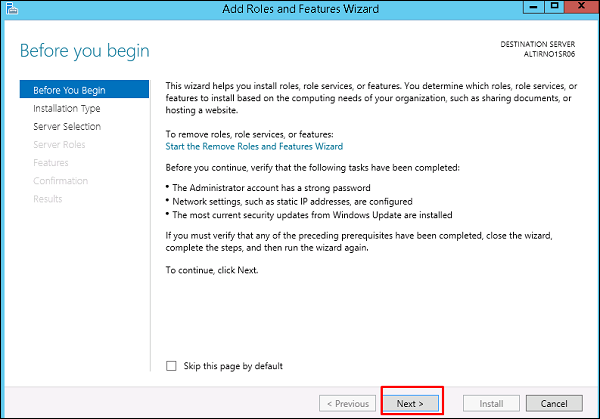
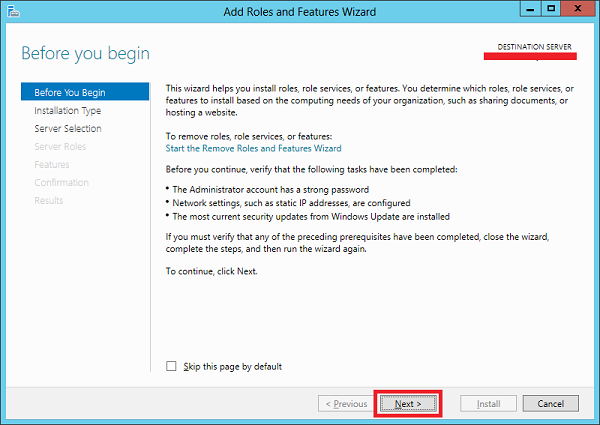
Step 1 − Go to “Server Manager” → Manage → Add Roles and Feature.
Step 2 − Click the Next button.
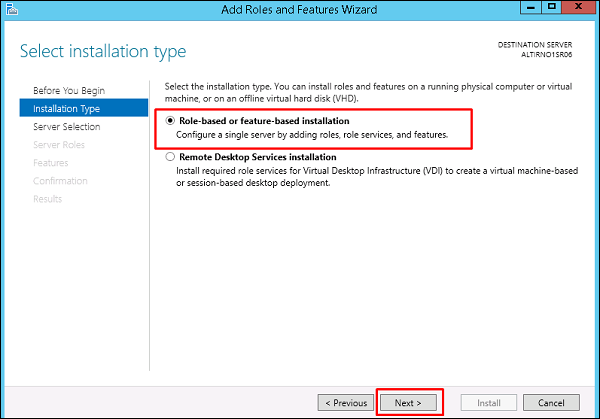
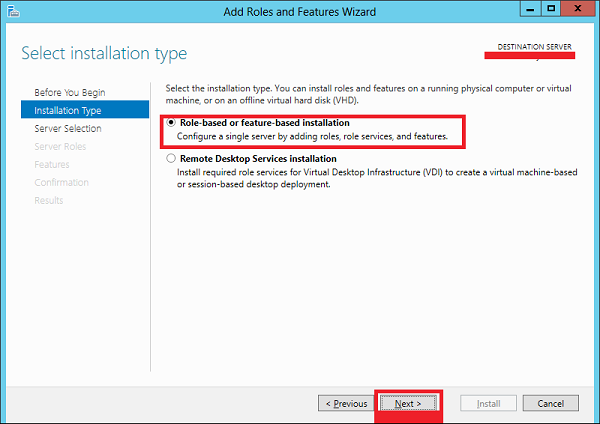
Step 3 − As we are installing AAD on this machine, we will select “Role-based or featurebased Installation” → Next.
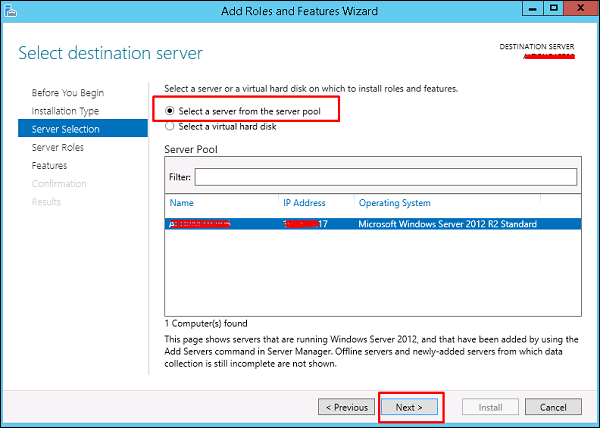
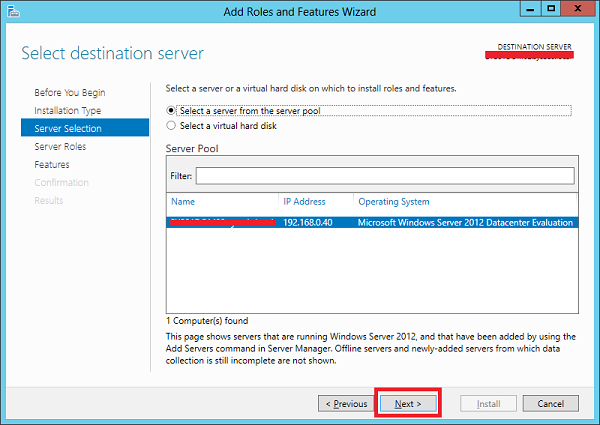
Step 4 − Click on “Select a server from the server pool”, this is the case when it will be installed locally.
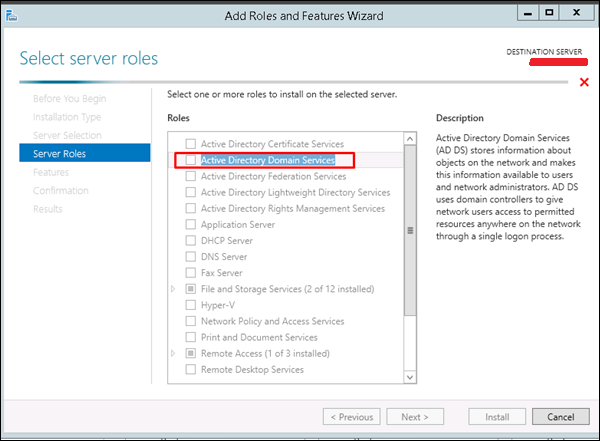
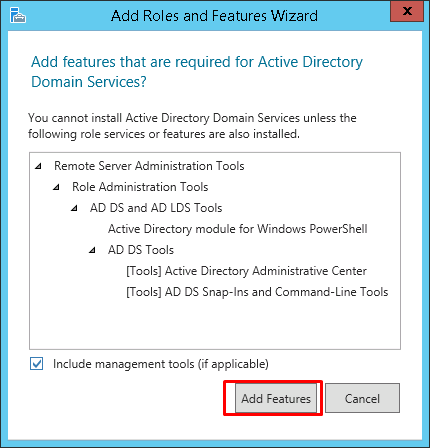
Step 5 − Check mark in the box next to Active Directory Domain Services. A box will be explaining additional roles services or features which are also required to install domain services.
Step 6 − Click Add Features.
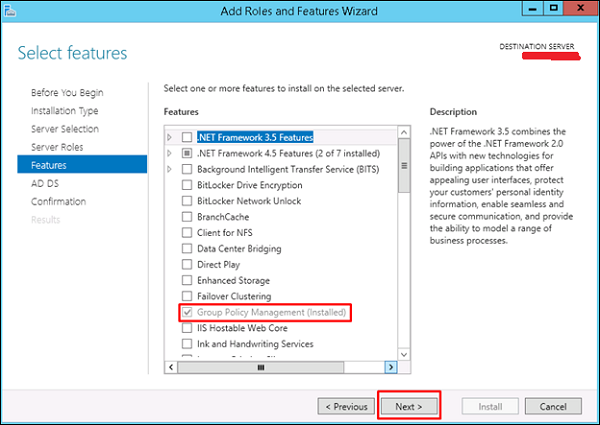
Step 7 − Check “Group Policy Management” → Next.
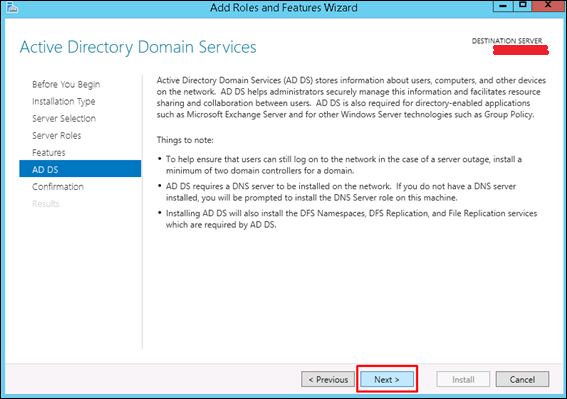
Step 8 − Click the “Next” button.
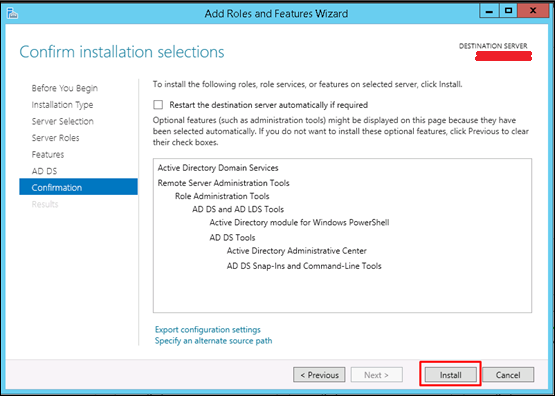
Step 9 − Click “Install”.
Installation Screen will come up now and you have to wait until installation bar completes.
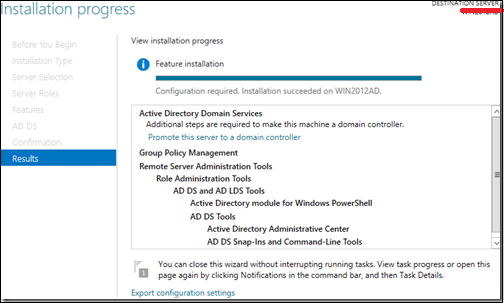
Now that the installation of DC role is finished, you have to configure it for you server.
Step 10 − Click “Server Manager” → Open the Notifications Pane by selecting the Notifications icon from the top of the Server Manager. From the notification regarding configuring AD DS (Active Directory Domain Services), click Promote this server to a domain controller.
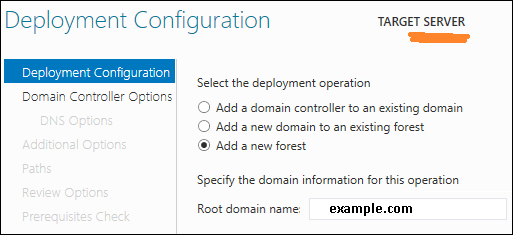
Step 11 − Click “Add a new forest” → Insert your root domain name into the Root domain name field. In my case, I have put “example.com”.
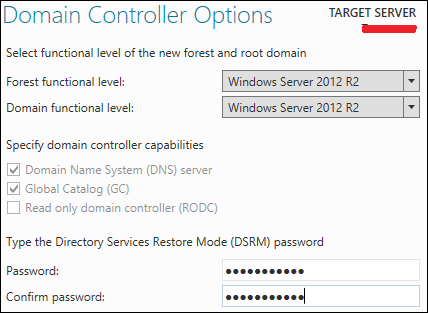
Step 12 − Select a Domain and Forest functional level. Once selected fill in a DSRM password in the provided password fields. The DSRM password is used when booting the Domain Controller into recovery mode.
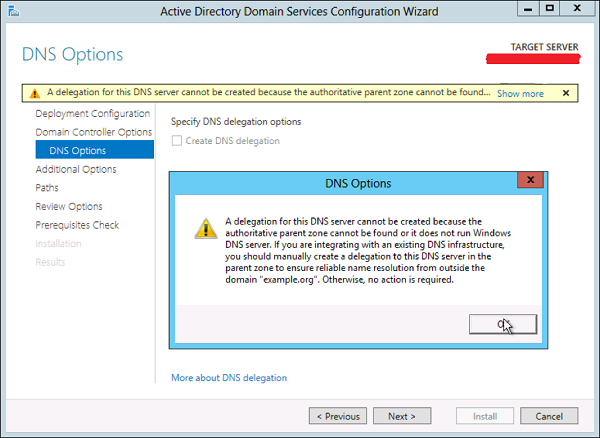
Step 13 − In the next screen which shows up, there is a warning on the DNS Options tab, click OK and then select Next.
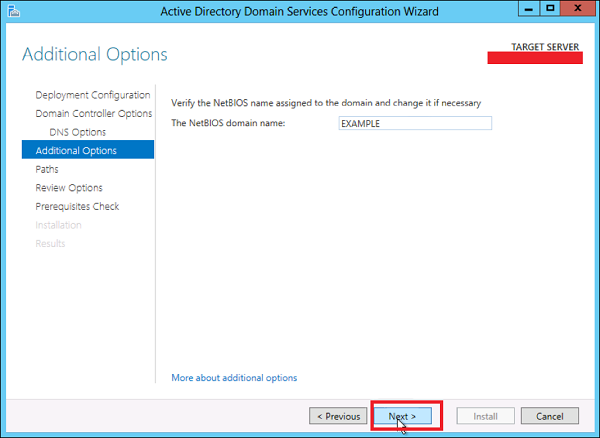
Step 14 − Enter NETBIOS name and click “Next”.
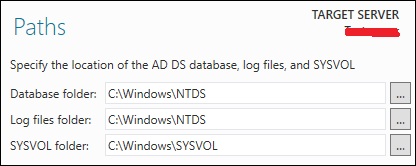
Step 15 − Select location of the SYSVOL, Log files and Database folders and then click Next.
Step 16 − Click “Install” and wait until it is finished. The server will restart several times.

The installation is now complete.
Windows Server 2012 - DC Accounts
In Windows 2012, creating account OU and group is nearly the same as in the previous versions.
To Create an OU user, please follow the steps given below.
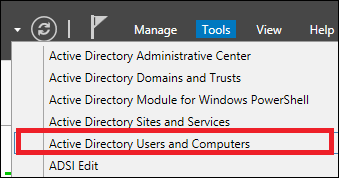
Step 1 − Go to: Server Manager → Tools → Active Directory Users and Computers.
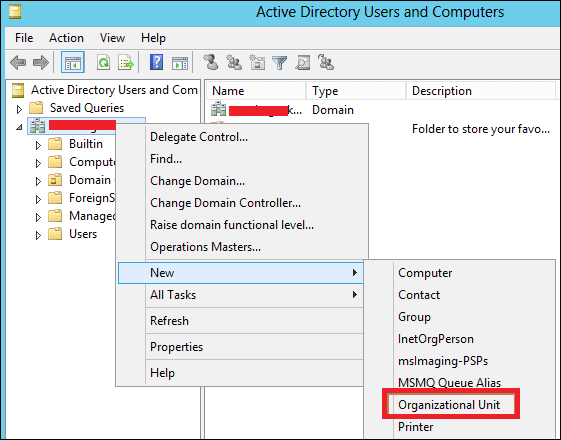
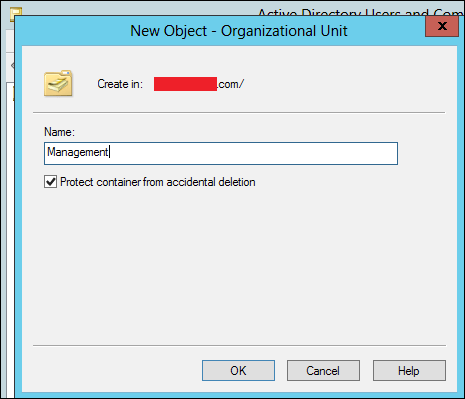
Step 2 − To create an OU named Management. Right-click domain in Active Directory Users and Computers, choose New and click Organizational Unit.
Step 3 − Type Management to name the OU. Check the Protect container from accidental deletion option. This option will protect this object from accidental deletion.
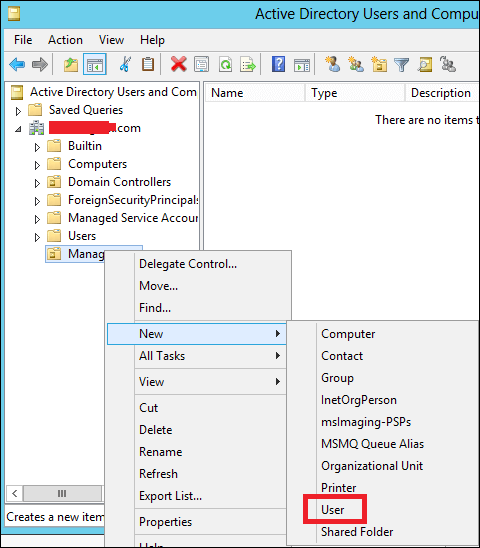
Step 4 − To create a user, Right-click on the Management OU → click New → and then click User.
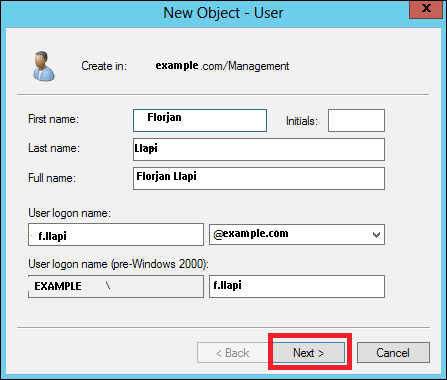
Step 5 − Complete the field with the data of the users → then click Next.
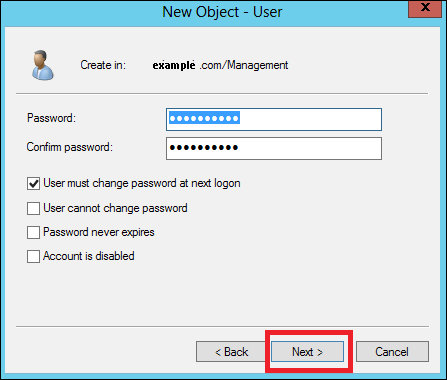
Step 6 − Now type-in the password. Check on the tick box → User must change password at next logon. The user will be forced to change the password when the user logs in → Click Next → and then click Finish.
Windows Server 2012 - File System
In Windows Server 2012 a new file system it is presented with is caller Resilient File System (ReFS).
The key attributes of ReFS include −
- Maintaining a high level of data availability and reliability, even when the individual underlying storage devices experience failures.
- Providing a full, end-to-end resilient architecture when used in conjunction with Storage Spaces. When used together, ReFS and Storage Spaces provide enhanced resiliency to storage device failures.
The significant functionality included with ReFS is described below −
- Integrity − ReFS stores data in a way that protects it from many of the common errors that can normally cause data loss. When ReFS is used in conjunction with a mirror space or a parity space, detected corruption — both metadata and user data, when integrity streams are enabled — can be automatically repaired using the alternate copy provided by Storage Spaces. In addition, there are Windows PowerShell cmdlets (Get-FileIntegrity and Set-FileIntegrity) that you can use to manage the integrity and disk scrubbing policies.
- Availability − ReFS prioritizes the availability of data. Historically, file systems were often susceptible to data corruption that would require the system to be taken offline for repair. With ReFS, if corruption occurs, the repair process is both localized to the area of corruption and performed online, requiring no volume downtime. Although rare, if a volume does become corrupted or you choose not to use it with a mirror space or a parity space, ReFS implements salvage, a feature that removes the corrupt data from the namespace on a live volume and ensures that good data is not adversely affected by non-repairable corrupt data. Because ReFS performs all repair operations online, it does not have an offline chkdsk command.
- Scalability − As the amount and size of data that is stored on computers continues to rapidly increase, ReFS is designed to work well with extremely large data sets — petabytes and larger — without performance impact. ReFS is not only designed to support volume sizes of 2^64 bytes (allowed by Windows stack addresses), but ReFS is also designed to support even larger volume sizes of up to 2^78 bytes using 16 KB cluster sizes. This format also supports 2^64 – 1-byte file sizes, 2^64 files in a directory and the same number of directories in a volume.
- Proactive Error Correction − The integrity capabilities of ReFS are leveraged by a data integrity scanner, which is also known as a scrubber. The integrity scanner periodically scans the volume, identifying latent corruptions and proactively triggering a repair of that corrupt data.
When the metadata for a ReFS directory is corrupted, subfolders and their associated files are automatically recovered. ReFS identifies and recovers the files while ReFS remains online. Unrecoverable corruption of the ReFS directory metadata affects only those files that are in the directory in which the corruption has occurred.
ReFS includes a new registry entry, RefsDisableLastAccessUpdate, which is the equivalent of the previous NtfsDisableLastAccessUpdate registry entry. The new storage command lets in Windows PowerShell are available (Get-FileIntegrity and SetFileIntegrity) for you to manage the integrity and disk scrubbing policies.
Group Managed Service Accounts
The Managed Service Accounts (MSA) was introduced in Windows Server 2008 R2 to automatically manage (change) passwords of service accounts. Using MSA, you can considerably reduce the risk of system accounts running system services being compromised. MSA has one major problem which is the usage of such service account only on one computer. It means that MSA Service Accounts cannot work with cluster or NLB services, which operate simultaneously on multiple servers and use the same account and password. To fix this, Microsoft added the feature of Group Managed Service Accounts (gMSA) to Windows Server 2012.
To create a gMSA, we should follow the steps given below −
Step 1 − Create the KDS Root Key. This is used by the KDS service on DC to generate passwords.
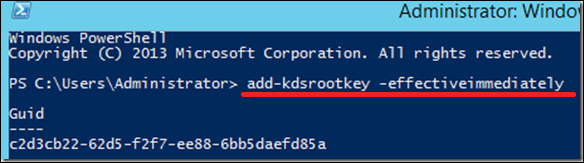
To use the key immediately in the test environment, you can run the PowerShell command −
Add-KdsRootKey –EffectiveTime ((get-date).addhours(-10))
To check whether it creates successfully or not, we run the PowerShell command −
Get-KdsRootKey
Step 2 − To create and configure gMSA → Open the Powershell terminal and type −
New – ADServiceAccount – name gmsa1 – DNSHostNamedc1.example.com – PrincipalsAllowedToRetrieveManagedPassword "gmsa1Group"
In which,
- gmsa1 is the name of the gMSA account to be created.
- dc1.example.com is the DNS server Name.
- gmsa1Group is the active directory group which includes all systems that have to be used. This group should be created before in the Groups.
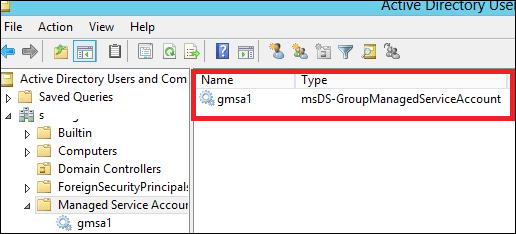
To check it, Go to → Server Manager → Tools → Active Directory Users and Computers → Managed Service Accounts.
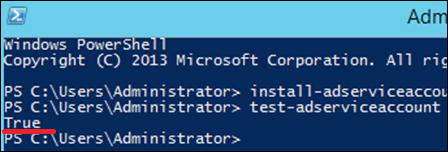
Step 3 − To install gMAs on a server → open PowerShell terminal and type in the following commands −
- Install − ADServiceAccount – Identity gmsa1
- Test − ADServiceAccount gmsa1
The result should come “True” after running the second command, as shown in the screenshot given below.
Step 4 − Go to service properties, specify that the service will be run with a gMSA account. In the This account box in the Log on tab type the name of the service account. At the end of the name use symbol $, the password need not to be specified. After the changes are saved, the service has to be restarted.
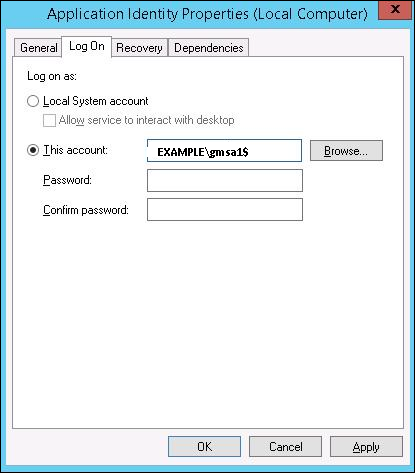
The account will get the “Log On as a Service” and the password will be retrieved automatically.
Group Policy Overview
The features of Group Policy Management were installed during the DC Role Installation. Many of the management features haven’t changed as compared to the previous versions of Windows Server. To create a GPO (Group Policy Overview), we need to follow the steps given below.
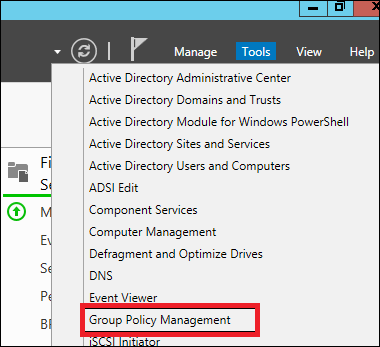
Step 1 − To create a GPO open the Group Policy Management Console (GPMC), go to Server Manager → Tools → Group Policy Management as shown in the screenshot below.
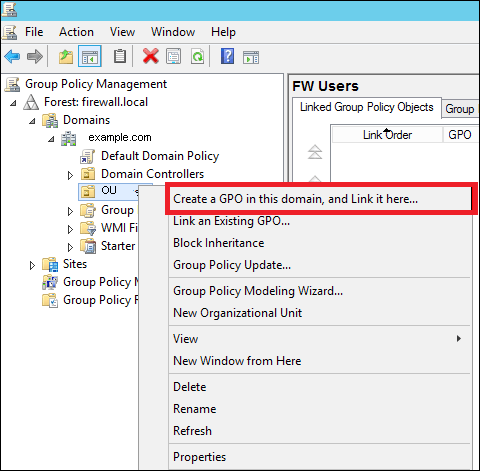
Step 2 − Right-click on an OU → select the first option Create a GPO in this domain and Link it here.
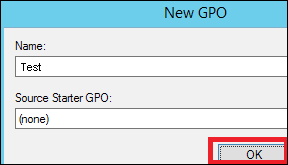
Step 3 − Type the Name for this GPO object → click OK button. We have selected the name as Test GPO.
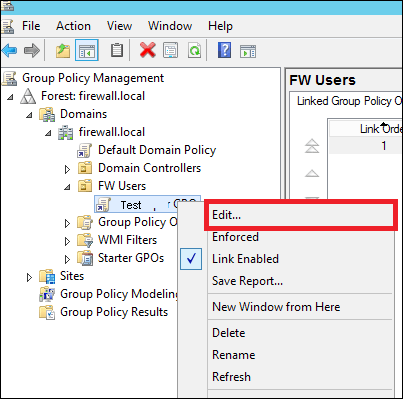
Step 4 − Right-click the GPO object and click Edit.
Windows Server 2012 - DHCP Role
As you know Dynamic Host Configuration Protocol (DHCP) is commonly implemented network services in today’s network environments. DHCP is primarily used to automatically distribute IP configuration settings to network clients, eliminating manually configuring hosts on TCP/IP-based networks.
To Install DHCP role, you will have to follow the steps given below.
Step 1 − Go to “Server Manager” → Manage → Add Roles and Features.

Step 2 − Click Next.
Step 3 − Select the Role-based or feature-based installation option → click Next.
Step 4 − We will install a Local DHCP Role as it will Select a server from the Server Pool → then click Next.
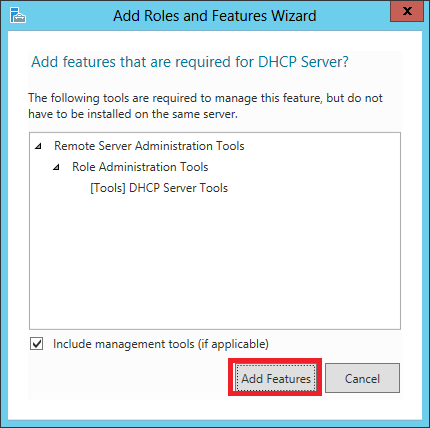
Step 5 − From the Roles lists, check the DHCP Server role → click Add Features on the popup windows as shown in the following screenshots.
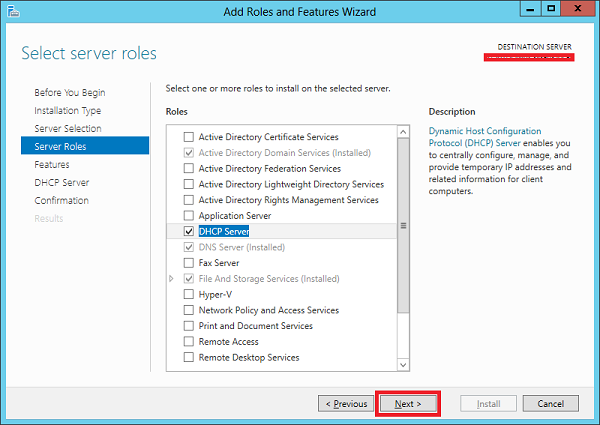
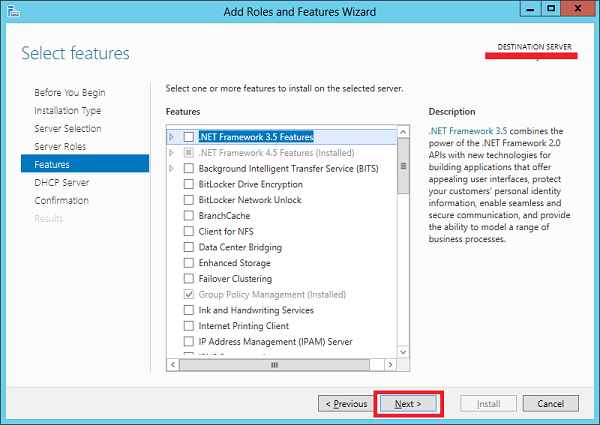
Step 6 − Click Next.
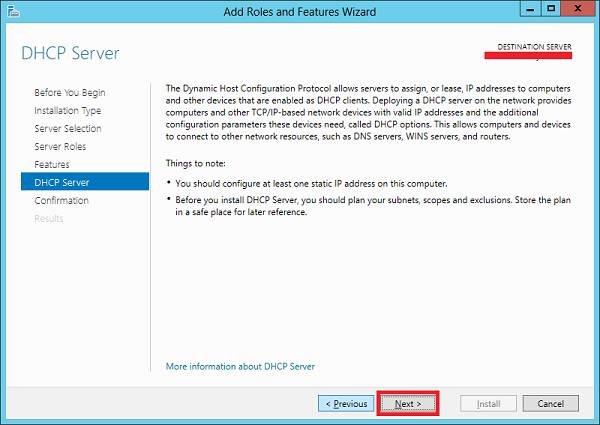
Step 7 − Click Next.
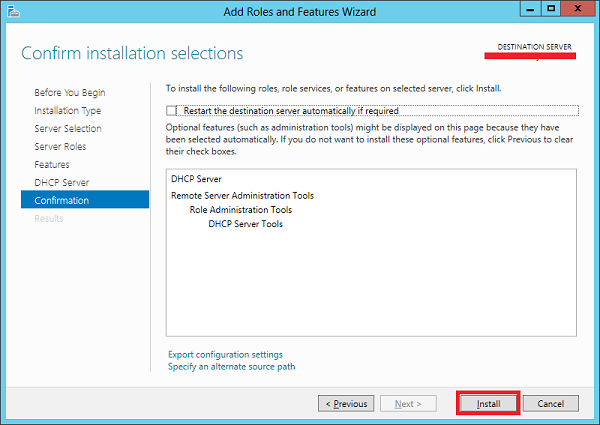
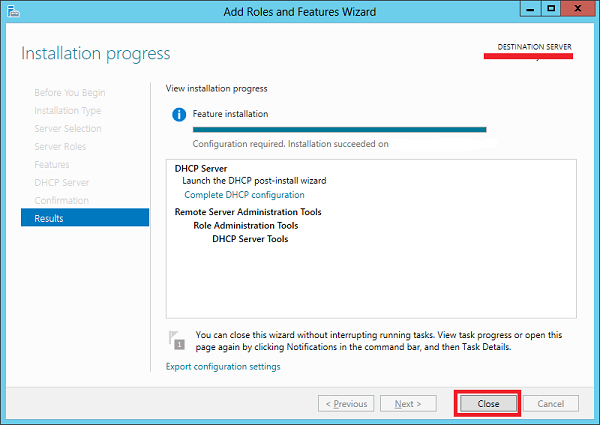
Step 8 − Click Install.
Step 9 − Click Close.
Post-deployment Configuration
In this section, we will see how to do the post-deployment configuration of the DHCP. Please follow the steps given below.
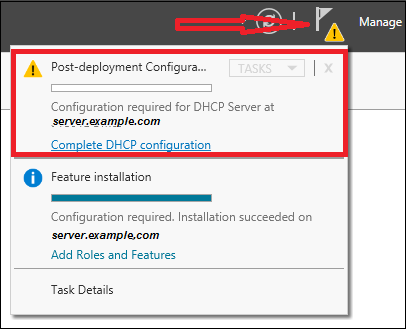
Step 1 − Click on the warning icon and then click on “Complete DHCP Configuration”.
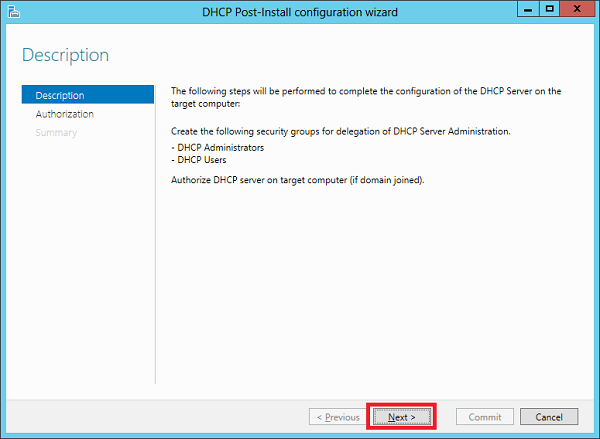
Step 2 − Click Next.
Step 3 − Select a domain user account that has permissions to create objects in the Net Services container in Active directory or a domain admin account → click Next.

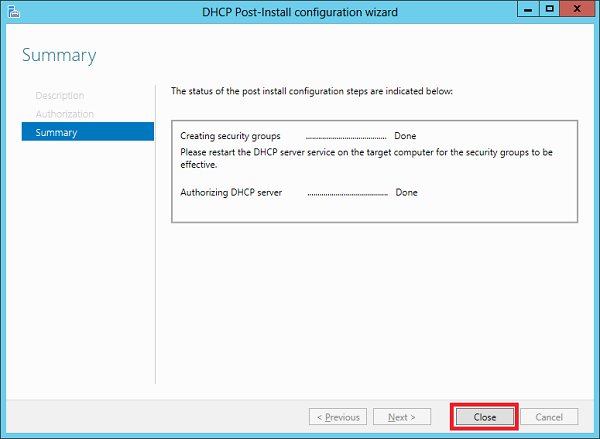
Step 4 − Click Close.
Scope Implementation of DHCP
Now we have to configure the service to make it useful for the computers. To do this, we need to follow the steps given below.
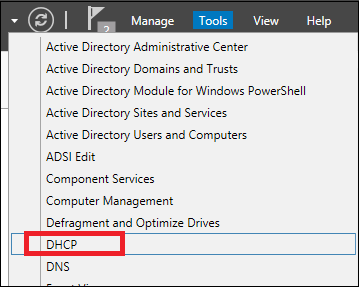
Step 1 − Server Manager screen → Tools → DHCP.
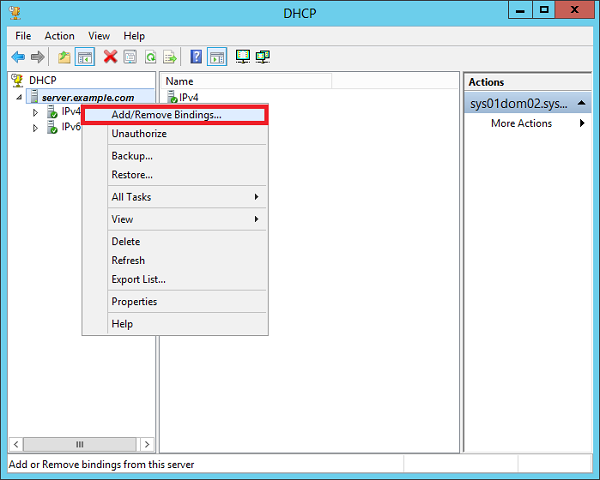
Step 2 − Right-click on the DHCP Server → then click on “Add/Remove Bindings… “
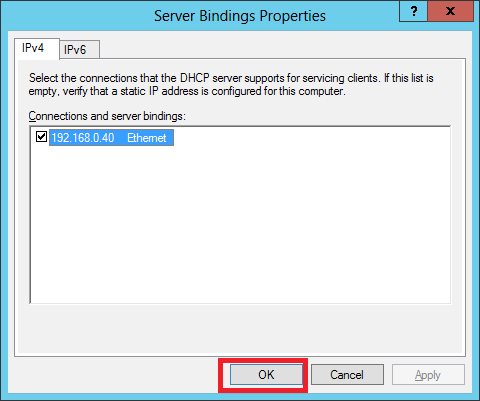
Step 3 − Ensure the static IP address of the server should appear as shown in the following screenshot.
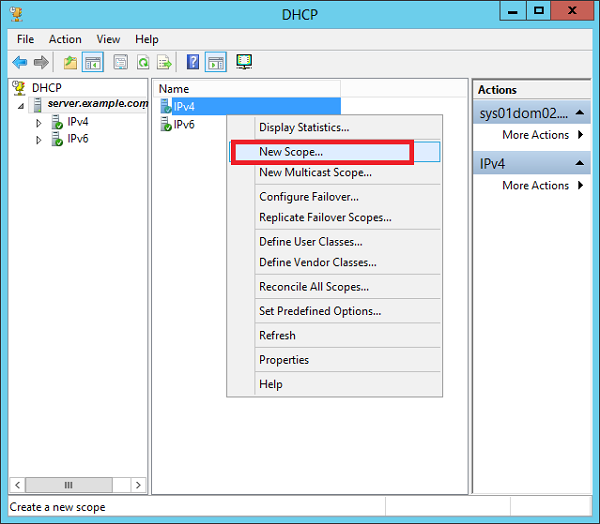
Step 4 − Right-click on IPv4 → Select “New Scope”.
Step 5 − Click “Next”.
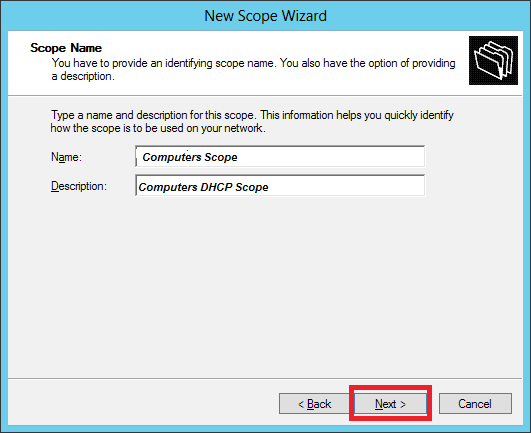
Step 6 − Enter Scope Name and description as shown in the following screenshot and then → Next.
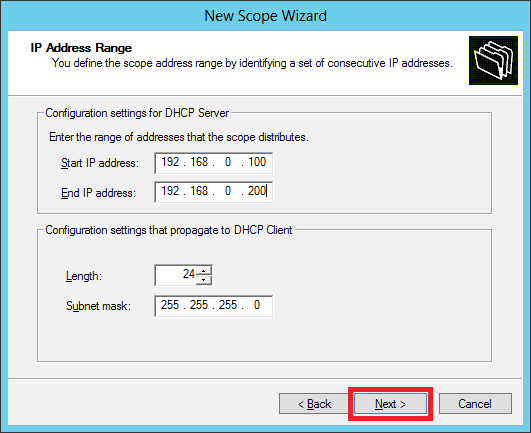
Step 7 − Enter the Start and End IP address, the Subnet mask, leave the Length as default “24” for class C subnet → click Next.
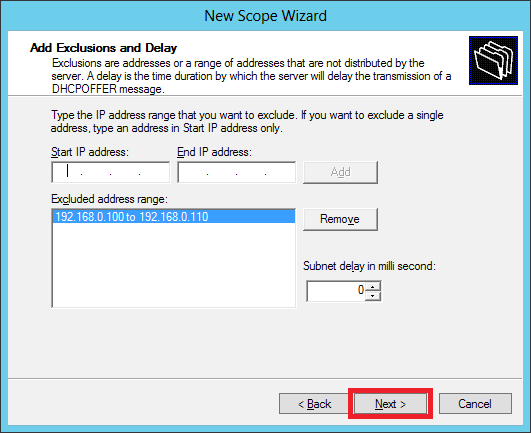
Step 8 − Enter your IP range in the exclusion list. If you have devices on the network that require static IP address and also ensure that the excluded range falls with the Start and End range earlier specified, then → click Next.
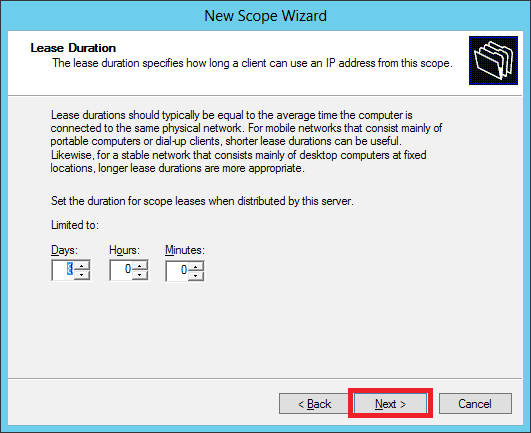
Step 9 − Enter the desired lease duration for the assigned IP’s or leave as default → then click Next.
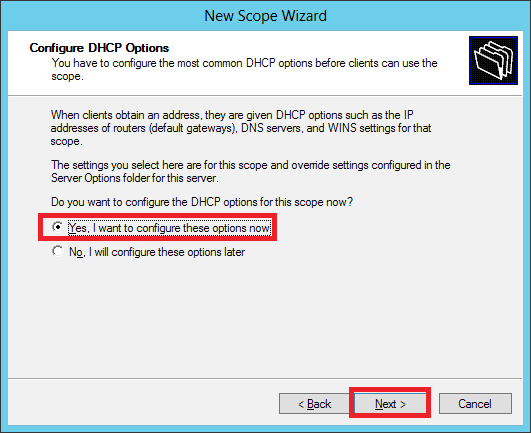
Step 10 − Select → Yes, I want to configure these options now to configure the DHCP options for the new scope → then click on Next.
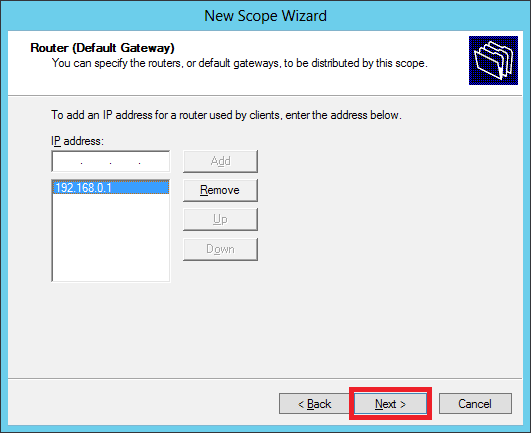
Step 11 − Enter the default gateway which is the IP of your Router → then click Next.
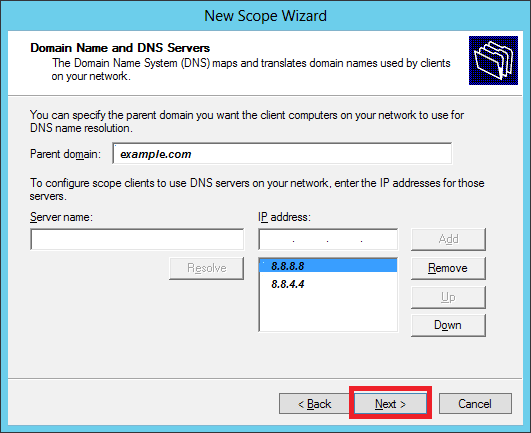
Step 12 − Add DNS IP → click Next (we can put Google DNS or if it is a Domain environment you can put the DC IP there) then click → Next.
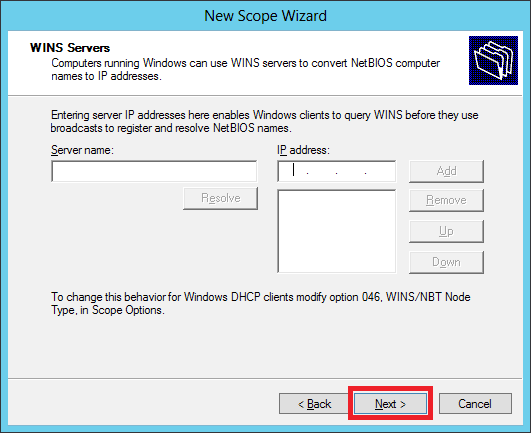
Step 13 − Specify your WINS Server if any and then click → Next.
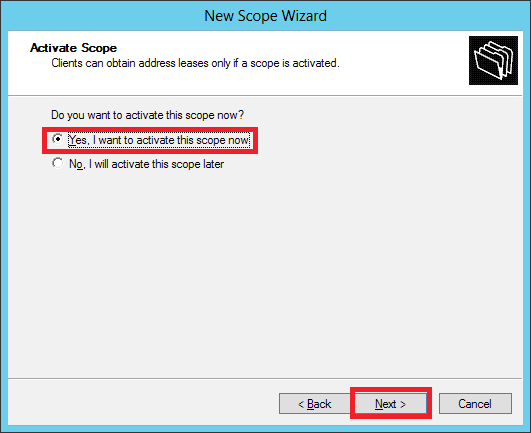
Step 14 − Select Yes, I want to activate this scope now option to activate the scope immediately and then click → Next.
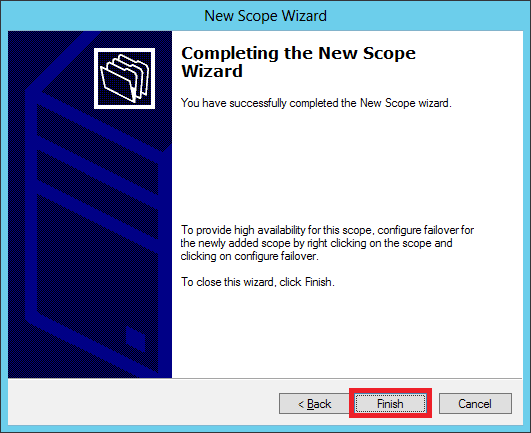
Step 15 − Click Finish.
Windows Server 2012 - DNS Role
DNS Role is one of the most important services in a network with Domain Controllers Environment. It helps us to resolve domain names internally and externally to IP and to have access to the requested service for the respective domain.
Let us now see how to install the DNS Role. For this we need to follow the steps given below.
Step 1 − To Install DNS role, go to “Server Manager” → Manage → Add Roles and Features.

Step 2 − Click Next.

Step 3 − Select the Role-based or feature-based installation option and then click Next.

Step 4 − We will install a Local DNS role as it will select a server from the server pool → and then click Next.

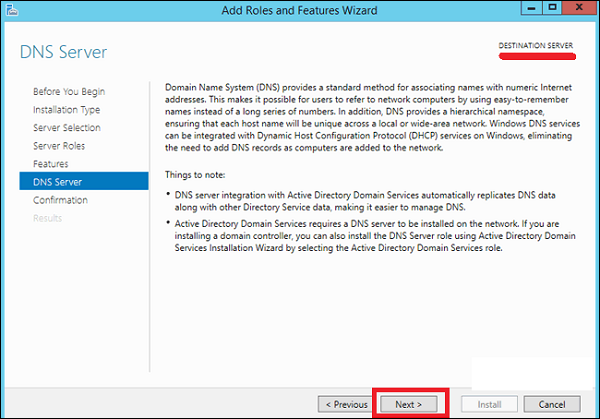
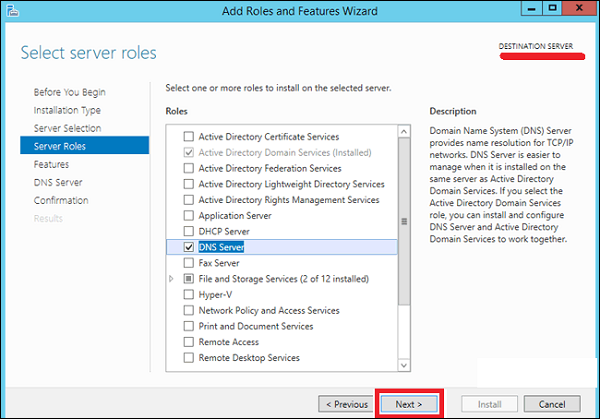
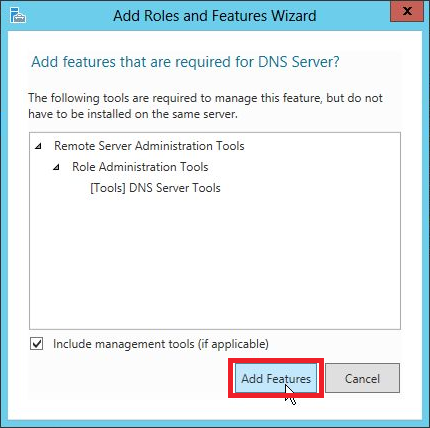
Step 5 − From the Server Roles lists, check the DNS Server role → click Add Features on the popup windows and then click Next.
Step 6 − Click Next.